Sunday 23 February 2020

Granny Boot Cuffs - Make your Mum something fabulous this Mother's Day, Mini Mother's Day Series Part 1

Hello friends.  I wanted to design something quick and easy, that would make a great Mother's Day gift and after making a pair of boot cuffs as part of a weekly CAL on Ravelry, I thought I would have a go at designing my own.  You all know how I love a granny square and putting the two together, I came up with these super cute Granny Boot Cuffs.  Then it occured to me, "why have only one Mother's Day gift idea?", so instead we will be having a mini series of patterns coming out over the next few weeks, so make sure you are subscribed and don't miss out on any posts.


As always an ad free pdf version of this pattern is available in my online stores, thank you for helping to support my work...
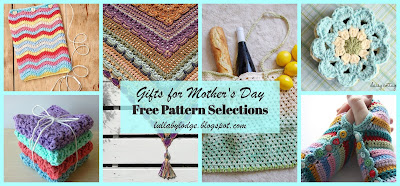
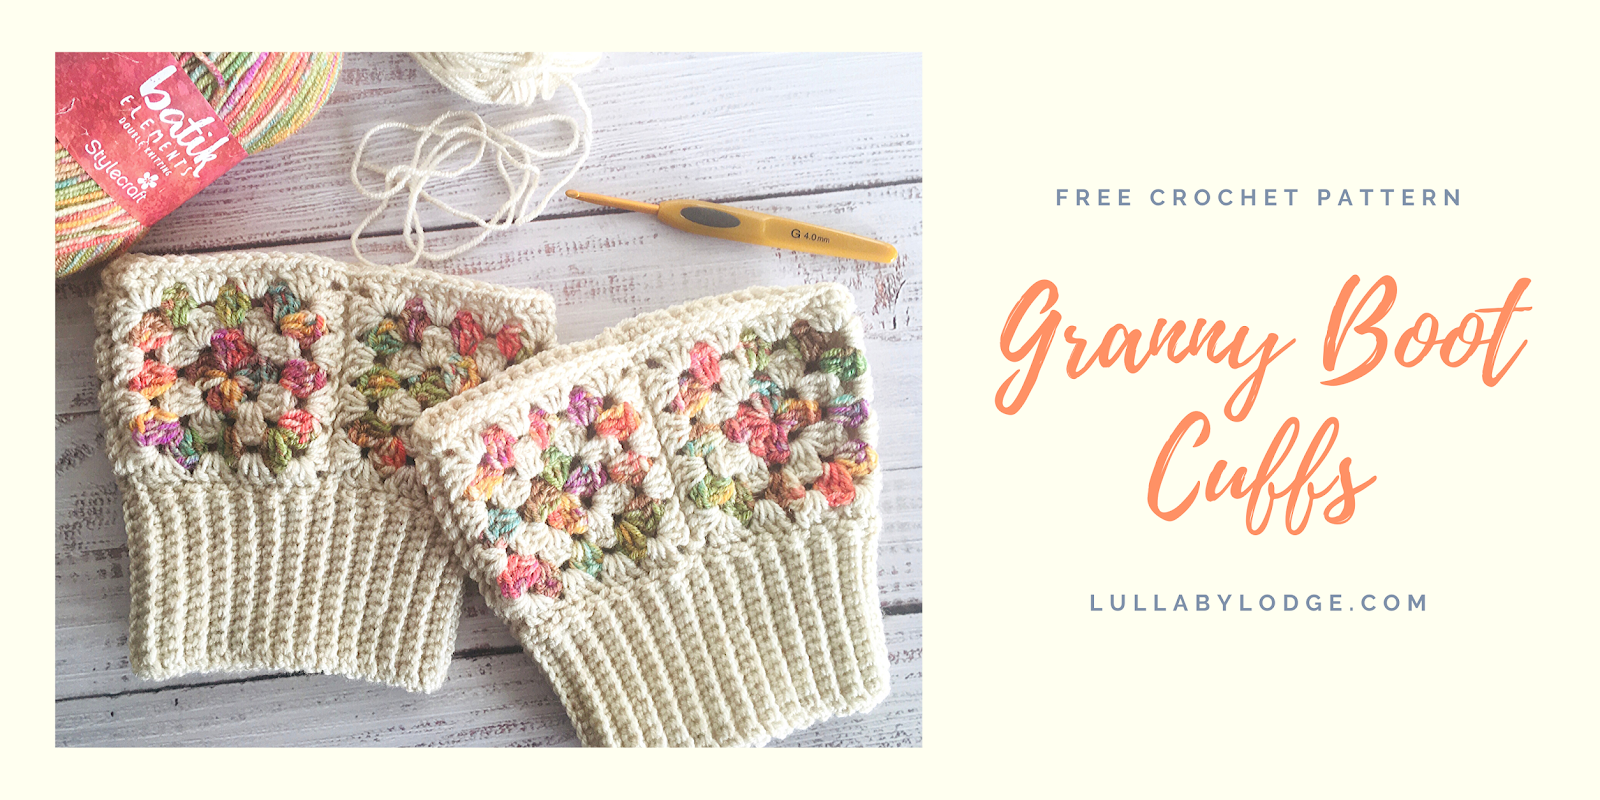


Granny Boot Cuffs


Materials

Stylecraft Batik DK in 2 colours
4mm (G) & 3.5mm (E) hook (sizes XS-S, XL)
3.5mm (E) & 3mm (C) Hook (size M-L)
Darning needle

Size

XS-S, M-L, XL

Ability

Intermediate

Abbreviations US Terms (UK conversion)

sc - single crochet (double crochet)
dc – double crochet (treble crochet)
ch – chain
sp - space
st(s) - stitch(es)
sk – skip
bl – back loop
mc – main colour
cc – contrast colour

Sizing:  Measure around your calf to find your correct size (measure the widest part of your calf where you would like the cuffs to sit)Size XS-S will fit 12-13 inches (30 -36cm), M-L will fit from 13-15 inches and XL will fit from 15-16 inches (36-41cm).

Other notes:  Alternate between mc and cc each round and join in new colours with a sl st, if you wish to make in only 1 colour, sl st to corner sp when starting a new round.   Size XS-S, start with mc, sizes M-L & XL start with cc.  Ch3 at start of round counts as dc (you may replace with a standing st or chainless dc if you prefer).  The larger sized hook is used for granny squares and sc edge.  The smaller hook is used for the ribbing.  Photos shown for M-L & XL sizes, there will be no round 4 for size XS-S and you will start with mc for round 1.

Granny Square Make 8

With large hook ch4 and join with sl st to form ring.

Round 1 (Right side), Ch3, 2dc into ring, [ch2, 3dc into ring] 3 times, ch2, join with sl st to top ch3.


Round 2 Join new colour in corner sp, ch3, 2dc in same sp, ch2, 3dc in same sp, in next and every sp [3dc, ch2, 3dc], join with sl st to top ch3.


Round 3 Join new colour in corner sp, ch3, 2dc in same sp, ch2, 3dc in same sp, 3dc in each sp across sides, [3dc, ch2, 3dc] in each corner sp, join with sl st to top ch3.


Round 4 (M-L & XL only) repeat round 3.


Joining squares

With wrong sides together sew or sl st 4 squares together to form a tube.


Ribbing

Row 1 With right side facing, 3.5mm hook and mc, attach yarn at any seam with a sl st, ch15, sc in 2nd ch from hook and in each ch,  sl st to next 2 sts along bottom of granny square, turn.


Row 2 Sk both sl sts, sc in each st working in bl only, turn.


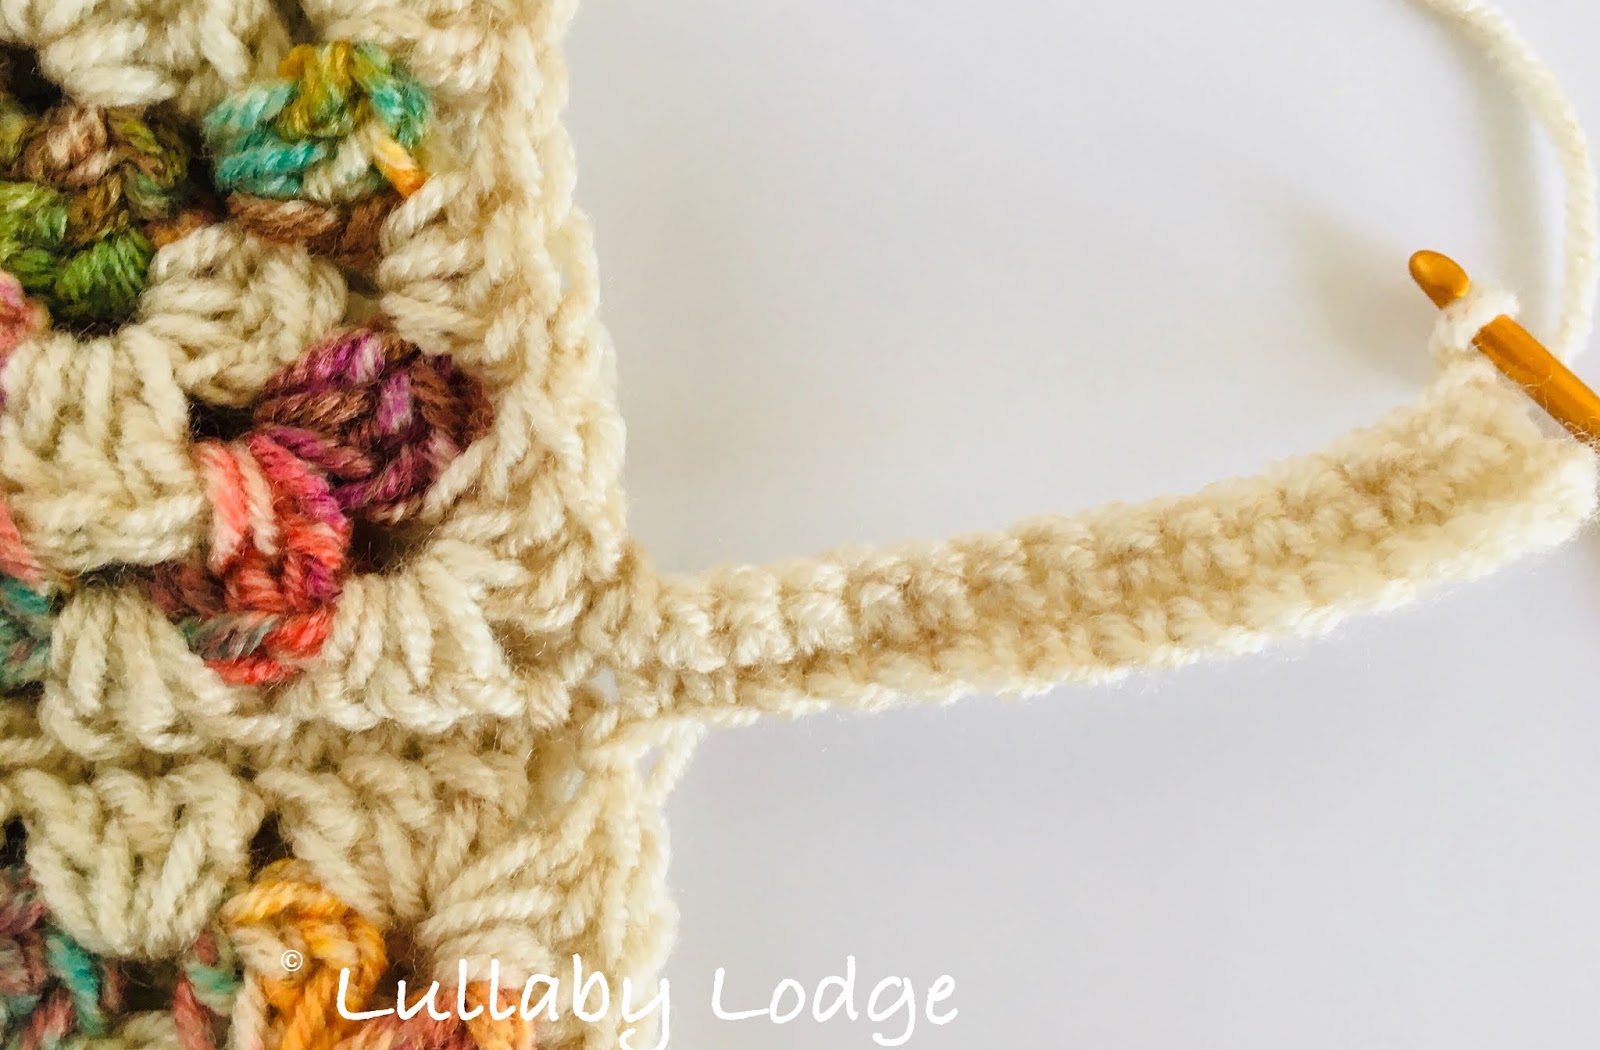
Row 3 Ch1, sc in each st working in bl only, sl st to next 2 sts along bottom of granny square, turn.

Repeat row 2 & 3 until you have worked around the entire cuff.  Do not fasten off.  Turning work inside out, sl st both edges together to join, fasten off.


With mc and large hook, join with sl st to top of cuff inline with back seam.  Ch1, sc in same place, sc in every st across, join with sl st and fasten off and weave in ends.


Make another cuff to match...


I hope you enjoyed this pattern and I will be back very soon...

Catherine
x


If you would like to see even more from Lullaby Lodge, why not consider joining my premium subscription service...


You might also like...


Wednesday 19 February 2020

Easter Crochet Ideas - Take a break from all the chocolate and hook up one of these Easter treats...

We are already approaching the end of February, can you believe it?  Where has the time gone?  Well I guess it's time to delve into patterns to make for Easter and I have some beauties to share with you by all my favourite designers.


Easter Roundup


Crochet up this cute and cuddly bunny by 3am Grace Designs.

Easter Peep Kawaii Cuddler


The kids are going to need something to put all those eggs in, so why not make them this super cute Easter basket.  Pattern by Loops & Love Crochet.

Crochet Bunny Basket


More bunnies here, this time teeny tiny amigurumi ones designed by Hooked On Patterns.

Kawaii Bunnies


Crochet up these super cute egg cosies, pattern by Thoresby Cottage.

Crochet Egg Cosy


Another Easter basket pattern, I love the spike stitches on this one.  Design by Jen Hayes Creations.

Spike Stitched Easter Baskets


Add some something cute and fluffy to your Easter decor, with this delightful cushion pattern by Crochet Cloudberry.

Fluffy Bunny Cushion Cover


This little cutie is so quick and easy to make and he will help keep your keys safe.  Pattern designed by Modesty by Laura.

Bunny Keychain


Dress up your little one in this adorable bonnet with bunny motifs.  This pretty little hat pattern is designed by Sincerely Pam.

Bunny Bonnet


Lastly we have this adorable little guy, he looks so cute in his little outfit.  This pattern and crochet along can be found at The Loopy Lamb.

Buttons The Bunny


Pin it for later...


Check out this link blast for more Easter crochet ideas...


Thanks for stopping by, I do hope you will check out some of these patterns they are all by really talented designers and I will be back soon...

Don't forget to subscribe!

Catherine
x


You might also like...


Sunday 16 February 2020

Timeless Drifter Earwarmer - A quick & easy make to keep those ears nice and toasty this winter...

Hello everyone, I really love it when I get to share new patterns with you and I am so excited to share this one.  It's quick and easy to make and is the perfect thing to keep your ears cosy in the last of the winter weather and through spring.  The pattern is also available as an ad free pfd with also contains sizes from baby - large adult, this may be purchased from my online stores.


As a Lovecrafts affiliate I may receive a small commission from qualifying purchases...

Timeless Drifter Earwarmer


Materials

Darning needle
Stitch marker
6mm (J) hook
5mm (H) hook 

Size

Adult (sizes baby - large adult are available in the pdf version)

Ability

Intermediate

Abbreviations US Terms (UK conversion)

sc - single crochet (double crochet)
blsc – back loop single crochet (back loop double crochet)
dc – double crochet (treble crochet)
hdc – half double crochet (half treble crochet) fpdc – front post double crochet (front post treble crochet)
ch - chain
st(s) - stitch(es)
pm – place marker
sk – skip
inc – increase (2sc in same st)


Other notes:  The head band is worked flat and seemed to form the twist.  Ribbing is then added to the bottom of headband, worked sideways, creating the finished ear warmer.

With Drifter and large hook, chain  61

Row 1 (Right side) sc in 2nd ch from hook and in every ch.  60 sts.

Row 2 Turn ch1 (does not count as st), hdc in 1st st, fpdc in each st across until last st, hdc in last st.   60 sts.

Row 3 Turn, ch1, sc in 1st st, sc in each st across.

Repeat rows 2 and 3,  4 more times.  Fasten off leaving a long tail.


Forming the twist

Place piece with right side facing up, in front of you.  Fold short ends in to the centre.  


Fold each short end in half and slot together. 


Sew through all 4 layers securely 


Pm where 2 sides cross over on bottom of headband (through both layers).  


Using Timeless join yarn in centre back, bottom of headband.

Round 1 Ch1, sc in same place, sc in each st around until 2 sts before marker, sk next st, [dc, 3hdc, dc] all in marked st, sk next st, sc in each remaining st, at the same time inc evenly around until you have  66 sts, join.


Ribbing

With small hook ch  9

Row 1 Sc in 2nd ch from hook and in every ch, sl st in next 2 sts on hairband.

Row 2 Turn, sk sl sts, blsc in each sc across.

Row 3 Turn, ch1, blsc in each sc across, sl st in next 2 sts on hairband.

Repeat rows 2 and 3 around hairband until all sts have been worked, fasten off and use tail to sew ribbing together.  Weave in any ends.


Looks great in different colours...


Pin it for later...


I hope you enjoyed this pattern and be sure to subscribe if you did, I post every week with free patterns, reviews and more...

See you soon
Catherine
x


If you love the content here at Lullaby Lodge and would like to see more, why not consider joining my premium subscription service and become a patron...


You might also like...


Wednesday 12 February 2020

Spiced Orange & Pumpkin Cake - A great way to use up all those winter squash, try it, it's delicious...

Hello everyone.  I have another recipe to share with you today.  This is a family favourite of ours, Little T particularly loves it.  As some of you know we have an allotment, where we grow our own fruit and veg.  For those of you over the pond who may not know what an allotment is, it's a small plot of land rented from either a private landlord or by the local council.  It's a great way to get outside and grow your own food and you get to meet lots of lovely people too.  We live in a very small flat and so with no garden of our own, our allotment is our little outdoor space.


In the autumn we harvested many, many winter squashes.  These store over the winter really well and will last until around March or April.  It's about this time of year that I start to process any of the squash that we have left for storing in the freezer.  I simply boil, mash and freeze.  You can use any kind of winter squash or pumpkin for this recipe, so if you don't grow your own, most supermarkets will sell some kind of winter squash and some places also sell tinned pumpkin puree.


We grew so many winter squash last year and still have many of the Crown Prince (the blue ones) and Uchiki Kuri (orange) ones left.  These are both particularly good for this recipe...


Spiced Orange & Pumpkin Cake


Ingredients

135g plain flour
220g soft brown sugar
1tsp baking powder
110g oil or melted butter
175g pumpkin / squash puree
2 eggs
Pinch of  mixed spice
Pinch of nutmeg
2tsp orange extract
Zest of 1 orange
Icing / frosting
Orange slices for decoration (optional)


  • Preheat oven to 170℃
  • Line and grease a 7 or 8 inch cake tin (we use an oblong tin but it doesn't really matter what shape)
  • Mix all dry ingredients together in a large bowl
  • Add all wet ingredients to another bowl and beat until well mixed
  • Combine the wet and dry ingredients together and mix until incorporated
  • Pour into the tin and bake for 25 mins
  • When the cake is cooked (when poked with a skewer it should come out clean), turn out on a rack to cool
  • Once cool, ice and decorate with orange slices


We often use shop bought buttercream icing for this cake but you can also make an orange drissel, by combining a little orange juice with icing sugar and orange extract.  The cake may also be enjoyed with no icing at all...


Pin it for later...


I hope you will give this a try and I will be back very soon...

Catherine
x


You might also like...


Saturday 8 February 2020

Gift Ideas For Mother's Day - Free crochet patterns by my favourite designers...

Hello friends, I hope you are all well.  So it's February already, where did the time go?  You may be thinking it's too early to be thinking about Mother's Day, but here in the UK Mother's Day is the 22nd of March this year, so we have just enough time to make something extra special and if you live over the pond you have even longer to create something beautiful.  Once again I have searched through my favourite designer's patterns, to bring you a wonderful selection of the best crochet patterns out there, many of which are super quick and easy to make.  I am sure you will find something that your mum will love...


The weather is still chilly here through February and March, so this quick and easy earwarmer would make a welcome gift.  The pattern is by Itchin For Some Stitchin.

Chunky Bowtie Headwarmer


Who wouldn't love this Jasmine Stitch cowl as a gift?  Pattern by Fluffy Stitches.

Jasmine Cowl


Mum's are always so busy that a handy crochet bag is a must have gift.  Perfect for shopping, a day at the beach or to stash wip's.  You can find this pattern at Loops & Love Crochet.

Ocean Vibes Bag


The perfect last minute gift, you can whip up these gorgeously, colourful, cloths, in no time at all.  Pattern by Green Fox Farm Designs.

Flora Dishcloths


This cowl is so pretty and the yarn does all the work for you, crocheted in Caron Cotton Cakes.  You can find the pattern at Thoresby Cottage.

Frosted Glass Cowl


Another quick and easy, earwarmer pattern.  This one by Brittany Alice Crochet.

45 Minute Ear Warmer


How gorgeous is this bag by The Loopy Lamb?

The Bobblelicious Bag


These crochet oven mitts not only look great but are such a practical gift.  If your mum loves cooking she will love these.  Pattern by Ned & Mimi.

Double Oven Mitt


Pretty Star Stitch hand warmers pattern, by Crochet Cloudberry.

January Sky Fingerless Gloves


I think this one is my favourite.  The yarn used is just delicious and the pattern sets it off perfectly.  Design by Salty Pearl Crochet.

Clearwater Beach Buttoned Cowl


Pin it for later...


I hope you enjoyed my selections and have found a perfect gift for someone you love.  Which one would you make for your mum?  Let me know in the comments below.


See you all again soon...
Catherine
x


You might also like...


This post contains Amazon Affiliate links...