Friday 18 June 2021

Crochet Water Balloons Free Pattern & Video Tutorial - Summer fun for your kids...

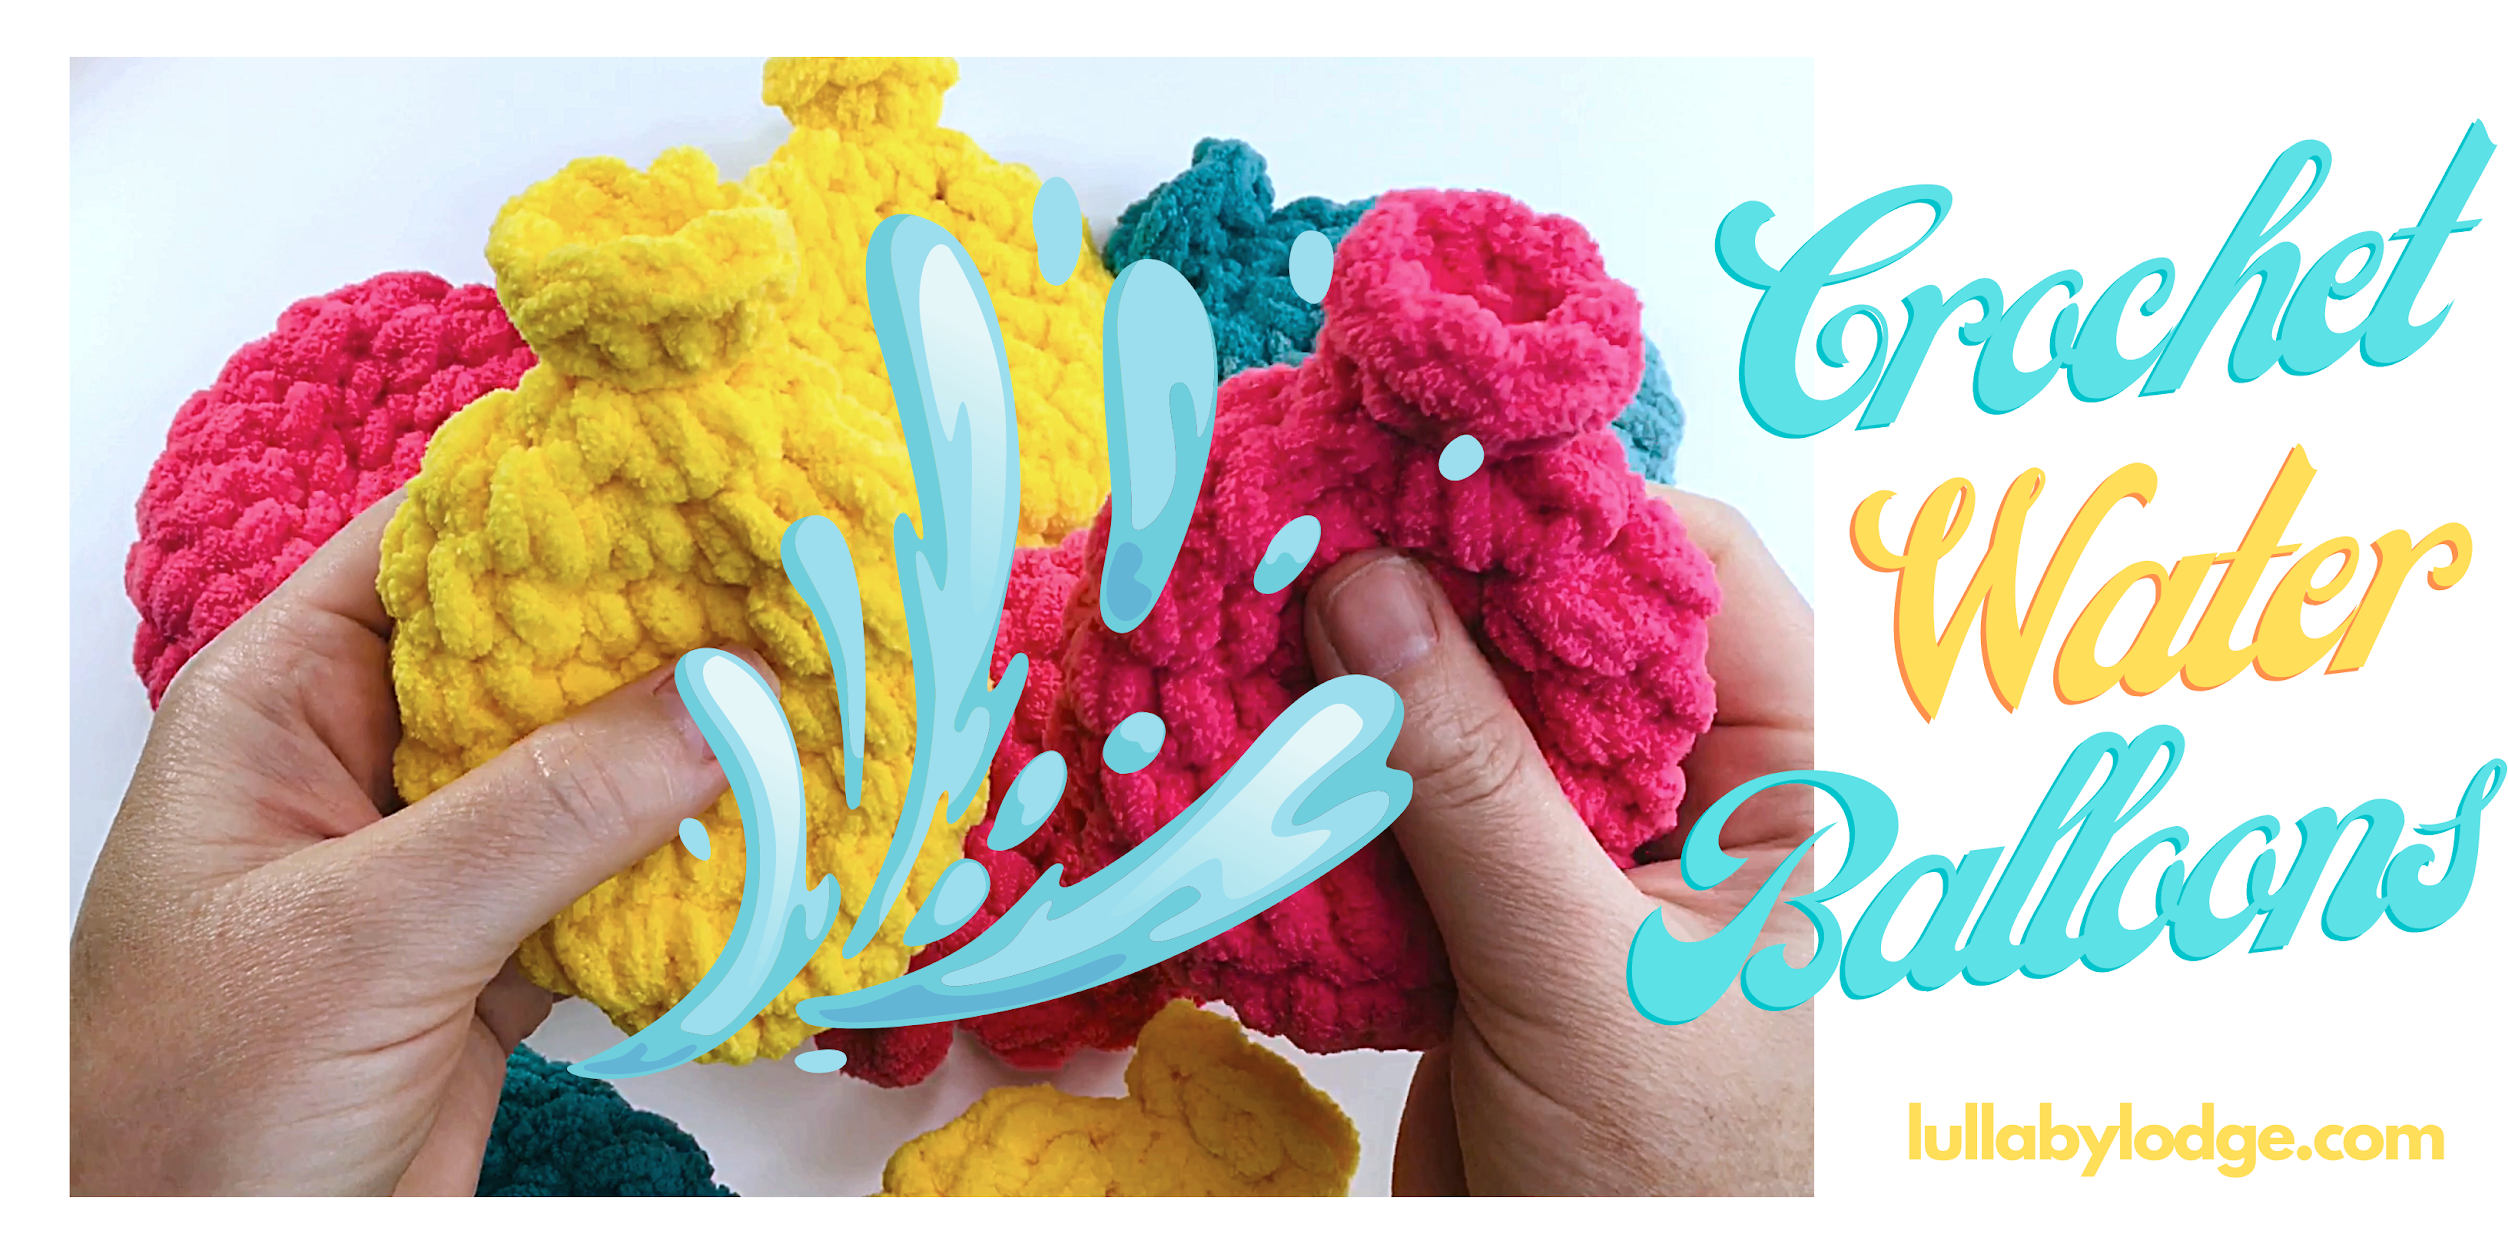
 Hello friends, I hope you are all enjoying the sunshine where ever you are.  We have had some lovely sunny weather recently, which has inspired me to make these super cute water balloons.  Your kids will have great fun playing with these outdoors in the sunshine.  A great way to cool down.


So how do they work?  Simply dunk them in clean water and throw (making sure to avoid the face).  Small children should of course be supervised.  Made with Bernat Blanket yarn, they are super soft and can be reused and easily washed.

I have designed two styles for you to choose from, the plain coloured balloons can be crocheted easily and is suitable for a beginner.  The helix striped balloons are a little more challenging, but I am sure a confident beginner could also pull these off.


As always an ad free pdf version of this pattern is available in my online stores, thank you for helping to support my work...


Crochet Water Balloons


Materials

Bernat Blanket yarn in various colours
8, 9, or 10mm hook
Darning needle
Stitch marker

Gauge

Not essential for this project

Ability

Easy

Abbreviations US Terms (UK conversion)

sc - single crochet (double crochet)
sc2tog - single crochet 2 together (double crochet 2 together)
sl st - slip stitch
ch - chain
st - stitch
pm - place marker

Size
This will vary depending on hook size used


Other notes:  These crochet water balloons are great fun for your kids and they are reusable.  Simply dunk in clean water and throw.  Please make sure to supervise young children and do not aim at the face.  I used an 8mm hook to make my balloons, if you would like them to be slightly larger use a bigger hook.  Remember to move marker after each round, always placing in the 1st st.


Single Colour Balloons


Video Tutorial


Chain 3 and join to form ring. 

Round 1 8sc into ring, pm in 1st st (do not join, we will be working in a spiral).  (8sc)


Round 2 2Sc in each st around.  (16sc)


Rounds 3-6 Sc in each st around.  (16sc)


Round 7 Sc2tog around.  (8sc)


Round 8 Repeat round 7.  (4sc)


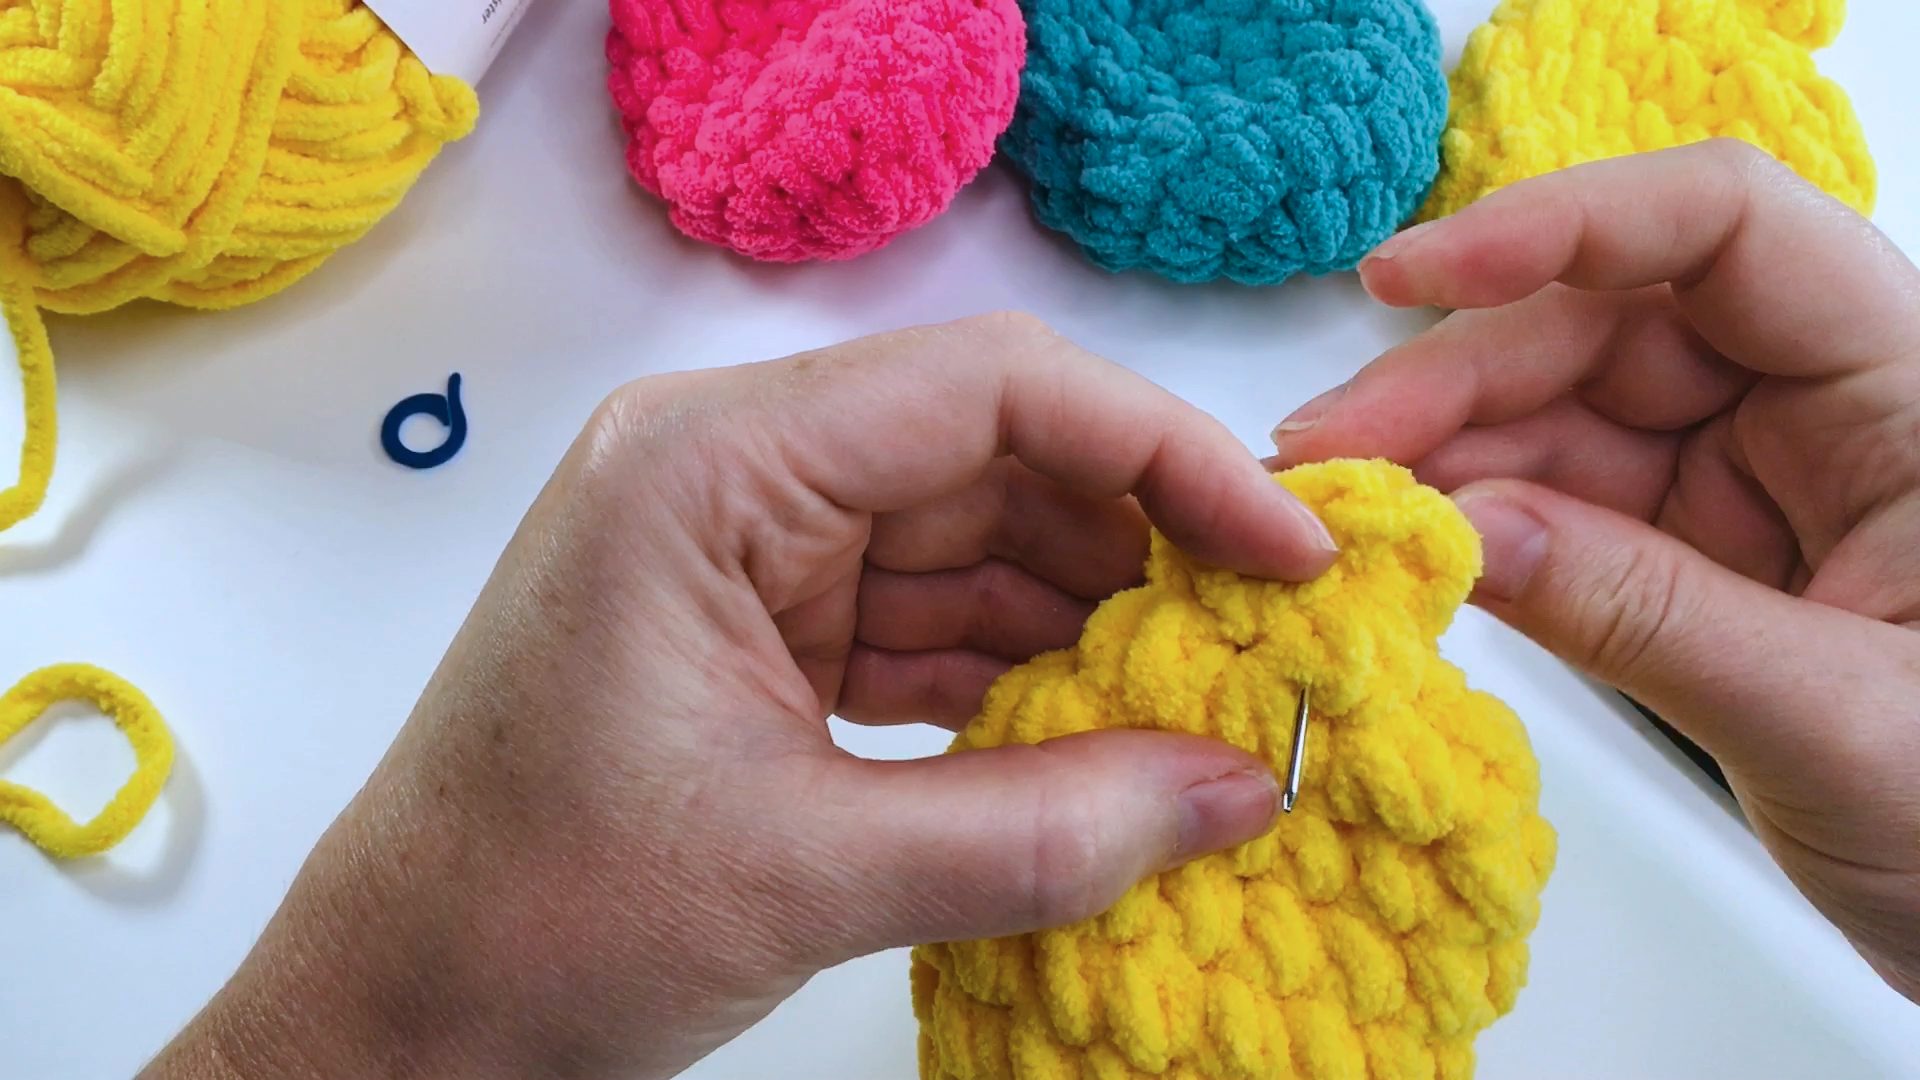
Round 9 2sc in each st around, sl st in next st.  Fasten off leaving a long strand.  (8sc)


With darning needle sew end through the inside of balloon neck and out the other side.  Wind around neck fairly tightly twice, then sew in end and fasten off.


Helix Striped Balloons


Video Tutorial


With colour A chain 3 and join to form ring.

Round 1 4sc into ring, remove hook and with colour B join with a sl st into ring, 2sc into ring.  (8sc)


Round 2 Continuing with B, 2sc in each st available, pm in 1st st, change to  A, 2sc in each st to marker.  (16sc)


Rounds 3-6 Continuing with A, sc in each st available, swap to B, sc in each st to marker.  (16sc)


Round 7 Keeping colours correct sc2tog around.  (8sc)


Round 8 Repeat round 7.  (4sc)


Round 9 Keeping colours correct 2sc in each st around, ending with a sl st for both colours.  Fasten off leaving a long strand and finish off as single colour balloon.  (8sc)


With darning needle sew end through the inside of balloon neck and out the other side.  Wind around neck fairly tightly twice, then sew in end and fasten off.


I hope you enjoyed this pattern and I will be back very soon with more content to share with you.

Take care for now...

Catherine
x


You might also like...


This post contains Amazon affiliate links...


Wednesday 27 January 2021

The Weekend Wonder, granny square blanket pattern with video tutorial...

Hello friends, as you probably know I have recently started a Youtube channel and I wanted to make some videos and tutorials especially for beginners.  I have disigned this crochet blanket with that in mind.  It's super simple and the video shows in detail how to make each stitch and also covers how to add in a new ball of yarn, or change colours.  I hope this will be a great starter project, for new crocheters that would like to make their first blanket.


I used a chunky weight yarn, which works up really fast making it ideal for beginners.  For a small sized lap blanket, you could even make this in as little as a weekend.  My chosen yarn also has a self patterning effect meaning you get a beautiful blanket without lots of colour changes.  Meaning less ends to weave in at the end.  This blanket would also look great made with yarn cakes.


Video Tutorial


As always an ad free pdf version of this pattern is available in my online stores, thank you for helping to support my work...


Weekend Wonder Blanket


Materials

3 balls James C Bett Marble Chunky (colour MC61)
6mm hook
Darning needle

Gauge

Not essential for this project

Ability

Beginner

Abbreviations US Terms (UK conversion)

Sc - single crochet (double crochet)
Dc - double crochet (treble crochet)
Sl st - slip stitch
Sp - space
Ch - chain
St - stitch


Other notes:  The granny square is turned after each round, this ensures no twisting of corners as the size increases.  Ch3 at the start of rounds counts as a double crochet.  You may use any yarn weigh for this blanket as long as you use the hook size recomended on your yarn ball band.  The blanket measures approximately 20x20 inches (100x100 cm) when made using recommended yarn.

Thick chunky yarns will work up faster and are ideal for beginners.  A small lap sized blanket may be made in as little as a weekend.  It is recommended that you make your tassels before starting your blanket, to make sure you have enough yarn.

About the yarn:  Marble Chunky is a super soft chunky / bulky weight yarn and comes in a huge variety of colours.  Each 200g ball has 312 metres and is 100% acrylic.  It may be both machine washed and tuble dried.


 Foundation Chain 4 and join with sl st to form ring.

Round 1 Ch3, 2dc into ring, ch2, [ 3dc into the ring, ch2] 3 times, join with  sl st to top  ch3.  Turn.


Round 2  Sl st into ch sp, ch3, 2dc into same sp, ch2, 3dc into same sp (corner formed), [ 3dc, ch2, 3dc into next sp] 3 times, join with sl st to top ch3.  Turn.


Round 3  Sl st into ch sp, ch3, 2dc in same sp, [3dc, ch2, 3dc] in each corner, 3dc in each sp across side of square, join with sl st to top ch3.  Turn.


Repeat round 3 until blanket is required size, do not fasten off, do not turn.

Single Crochet Border


Ch1, sc in same st, sc in each stitch around and 3sc in each corner, join with sl st to top of 1st sc.  Fasten off and weave in ends.


Tassels


Using tassel tutorial make 4 tassels and attach to each corner of the blanket.  I used 50 wraps with chunky yarn to make mine...


Thank so much for stopping by and I will see you all again very soon...

Catherine
x


You might also like...


This post contains Amazon affiliate links...


Saturday 19 December 2020

Sunflower Beanie - Add a little sunshine to your autumn & winter with my Sunflower Beanie...


Last week I shared my Sunflowers Scarf pattern with you all and this week we have the matching beanie.  Inspired by Van Gogh's famous painting, I hope this will add some sunshine to your life.  Crocheted in 100% new wool, this hat will keep your head cosy even in the coldest weather.


As always an ad free pdf version of this pattern is available in my online stores, thank you for helping to support my work...


Video Tutorial


Sunflower Beanie


Materials

Drops Alaska in Dark Brown Mix (A) 1, 50g ball, Mustard (B) 1, 50g ball, Off White (C) 2, 50g balls
Darning needle
Stitch marker
5mm (H) hook
4.5mm (7) hook

Gauge

4 x 4 inches (10x10 cm) = 14sts x 8 rows (in ldc) 

Ability 

Intermediate

Abbreviations US Terms (UK Conversion)

dc - double crochet (treble crochet)
sc - single crochet (double crochet)
hdc - half double crochet (half treble crochet)
ldc - linked double crochet (linked treble crochet)
lhdc - linked half double crochet (linked half treble crochet)
ch - chain
st(s) - stitch(es)
sp(s) - space(s)
sl st - slip stitch
cl - cluster
bcl - beginning cluster
ps - puff stitch
yo - yarn over
sk - skip
pm - place marker


Other notes: US terms throughout. Drops Alaska is a 100% new wool. Each 50g ball contains approx. 77 yds (70 m) and is hand wash only. When substituting yarn be sure to choose one with a similar gauge. When starting the first ps, pull up a loop to the height of the st, this looks more seamless than chaining 2 to start. 

Special Stitches 

Beginning cluster: Ch2, [Yo, insert hook into st and pull up a loop, yo pull through 2 loops] x3, yo pull through all loops, ch1 to lock in place. Cluster: [Yo, insert hook into st and pull up a loop, yo pull through 2 loops] x4, yo pull through all loops, ch1 to lock in place. 

Puff stitch: [Yo, insert hook into st and pull up a long loop] x4, yo pull through all loops, ch1 to secure puff. 

Linked double crochet: Insert hook into horizontal bar of previous st, yo and pull through loop, insert hook into next st, yo and pull up a loop, yo pull through 2 loops, yo pull through remaining 2 loops. 

Linked half double crochet: Insert hook into horizontal bar of previous st, yo and pull through loop, insert hook into next st, yo and pull up a loop, yo pull through all loops. 


With A and 5mm hook, ch4 and join with sl st to form ring. 

Round 1 Ch1 (does not count as st), 12sc into ring, join to 1st sc. (12sc) 


Round 2 Ch1, sc in same st, [ch3, sc in next st] around, ch3, sl st to sc. (12sc, 12 ch3 sps) 


Round 3 Sl st into next sp, ch1, sc in same sp, [ch3, sc in next sp] around, ch3, sl st to sc. (12sc, 12 ch3 sps) 


Round 4
 Pull up a loop, ps in ch sp, ps in same sp, [2ps in next sp] around, sl st to top ps. (24ps) With B, join with sl st in any ch sp.


Round 5 Bcl in same sp, [cl in next sp] around, sl st to top bcl. (24cl) With C, join with sl st in any ch sp. 


Round 6 Ch1, sc in same sp (pm), hdc in next st, ldc in next st, ldc in each sp and st around, do not join we will be working in a spiral. (72ldc)


Remember to move marker up each round. 

Round 7 Ldc in each st. (72ldc) 

Repeat round 7, 9 more times or until piece measures 8 inches (20cm) from top of crown ending with lhdc, sc, sl st in last 3 sts. Do not fasten off. 


Ribbing 


Row 1 With right side facing and 4.5mm hook, ch9, sc in 2nd ch from hook and in each ch, sl st to next 2 sts along bottom of hat, turn. (8sc) 


Row 2 Sk both sl sts, sc in each st working in bl only, turn. 


Row 3 Ch1, sc in each st working in bl only, sl st to next 2 sts along bottom of hat, turn. 

Repeat row 2 & 3 until you have worked around the entire hat. Do not fasten off. 

Turning work inside out, sl st or sc both edges together to join, fasten off and weave in ends.


I hope you enjoyed the tutorial and if you would like to make the matching scarf you can find the pattern here.

Make sure to subscribe so you don't miss any posts!

See you all again soon...

Catherine
x


You might also like...


This post contains Amazon affiliate links...