Granny Square Fingerless Gloves Free Pattern & Video Tutorial
Last updated: 26 September 2025
.png "how to crochet granny square fingerless mitts")
This post contains affiliate links. If you choose to purchase through these links, I may earn a small commission at no extra cost to you. Thank you for supporting my work and helping me continue to create free crochet patterns and tutorials.
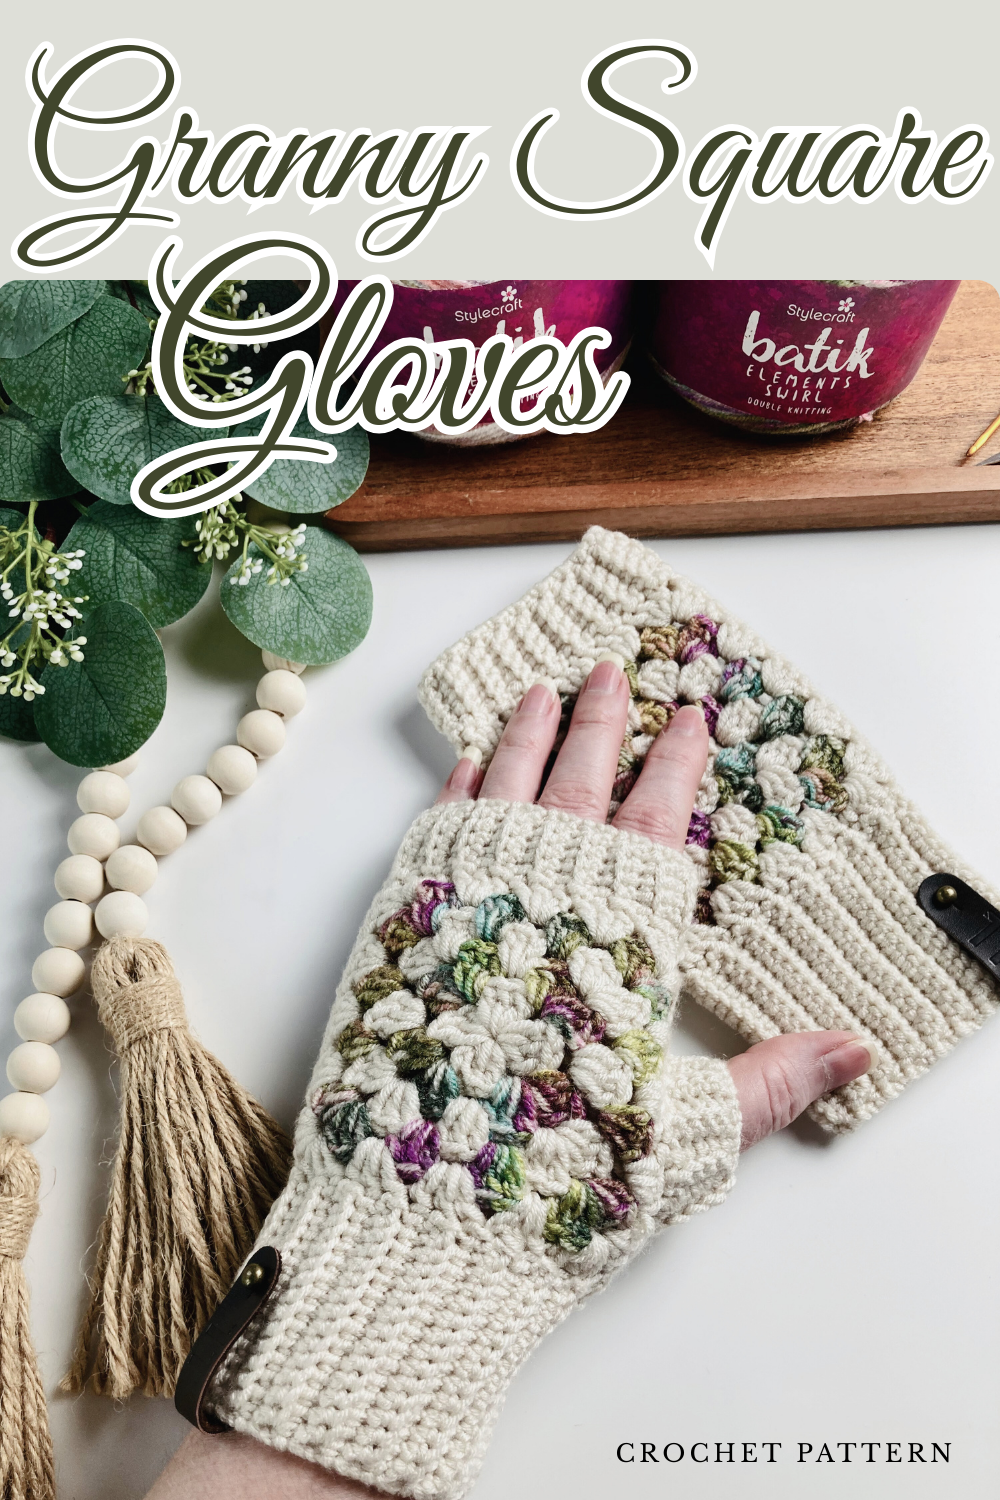
Elements granny square gloves – free crochet pattern
The very first design in the new Elements CAL is here! The Elements granny square gloves are a fresh update to one of my most popular patterns and a lovely way to kick off the crochet-along. So if you are looking to learn how to crochet granny square gloves, keep reading.
You can get all the yarn and materials needed for this project and the CAL here at LoveCrafts!

These fingerless granny square mitts are simple, fun to make, and packed with colour. I’ve updated the pattern with extra sizes, fresh yarn recommendations, and of course, a full video tutorial to walk you through every step.
.png "how to crochet granny square fingerless mitts")
The free version of this pattern (below) includes the adult sizes only.
If you’d like the full version of this pattern (including all sizes toddler–XL, printable project pages, and extra resources) you can grab the ad-free PDF in my shop.
 |  |  |
Or, if you don’t want to wait for each pattern in the crochet-along to be released, you can get the Elements Accessories ebook instead. The ebook includes all four matching patterns – gloves, beanie, cowl, and bandana – all in one place and at a lower price than purchasing all 4 individual patterns.
.png)
You Can Find the Other Patterns Here
 |  |  |
Why I Love this Kind of Project
Fingerless gloves are one of my favourite accessories to design because they’re practical yet stylish. They keep your hands warm while still letting you crochet, type, or use your phone. They also make quick gifts, and granny squares mean you can play with endless colour combinations.
What Makes This Stitch so Special
The design is built on the classic granny square but given new life with modern yarns. The colour changes in the Stylecraft Batik Elements Swirl DK really make each square pop, and when paired with a smooth yarn like Stylecraft Bellissima DK or King Cole Cherished DK, you get the perfect balance of colours.
What Inspired This Design
This is actually a re-imagining of one of my most popular glove patterns. I wanted to revisit it as part of the Elements CAL because so many people loved it the first time around. With updated sizing and a fresher yarn palette, it felt like the perfect project to launch the CAL. By the end of this pattern you will know exactly how to crochet granny square gloves.
Choosing Your colour Pallet
You’ll want one ball of a variegated yarn like Batik Elements for your contrast colour, and then pair it with a smooth, neutral main colour such as Bellissima or Cherished. Both yarns are soft, easy to work with, and come in plenty of shades so you can really customise your look.
Here are the yarns I used in my samples (I’ll add links for you to click through and shop your favourites):
Both Bellissima and Cherished feel almost identical, so either works perfectly alongside the Elements yarn.
.png "how to crochet granny square fingerless gloves")
Is this Pattern Beginner Friendly?
Yes! If you can make a granny square, you can make these fingerless mitts. The video tutorial breaks everything down step by step, from the squares, to joining, to ribbing. If you’re new to crochet gloves, this is a very approachable first project.
What You'll Need
You’ll use less than one ball of each colour per pair of gloves.
Elements Granny Square Gloves Video Tutorial
The video tutorial will guide you through every stage of the pattern.
Free Pattern (adult sizes)
Below is the written pattern for the adult sizes (S, M, L, XL). If you’d like the full pattern with children’s and toddler sizes included, as well as printable project pages, you’ll find it in the PDF version available in my shop.
Size Guide

.png "how to crochet fingerless granny square gloves")
Elements Granny Square Gloves
Pattern Details
Hook: 4.00 mm, 3.50 mm, 3.00 mm
Yarn: no more than 1 ball of each colour is used for all sizes.
Gauge: gauge varies by size, see chart in PDF.
Other items: yarn needle, scissors
Abbreivations US Terms (UK Terms)
sizes: S, M, L, XL (see PDF for toddler, child, tween)
Instructions
Pattern Notes
Read the pattern all the way through before starting.
A video tutorial is provided to guide you through each step, please refer to this if you are unsure of anything.
Alternate between MC and CC for each round of granny squares.
Chain 3 at start of round counts as dc throughout, you may use chainless stitches if you prefer.
In this pattern, writing in parentheses applies to each size in order, from smallest to largest.
Granny Square (make 4)
Blocking
We recommend blocking squares before joining.
Joining Squares
Sew squares together along one side, using mattress stitch or your preferred method. Then sew the opposite sides together leaving sufficient gap for the thumb.
Ribbing Top
Sizes M & XL using a 3.50 mm hook & all other sizes with a 3.00 mm hook.
Ribbing Cuff
Worked in the same way as the top ribbing, starting with ch13 [13, 15, 15]. Adjust starting chain for longer/shorter cuffs.
Ribbing Thumb
Worked in the same way, around the thumb gap, starting with ch5 [5, 6, 6].
.png "how to crochet granny square fingerless gloves") |
These Elements granny square gloves are a fun, stash-friendly project you’ll want to make in lots of colour combos. Don’t forget to share yours with the CAL community – I’d love to see them.
If you’d like the full expanded pattern with all sizes and extra printables, you can grab the PDF here.
Looking for more gloves patterns?
 |  |  |
I hope you enjoyed this new version of my Granny Square Gloves. Take care and I will see you very soon...
.png)
Looking for your next project? Check out some of my popular patterns below...
 |  |  |  |
Before you go...
Subscribe: I post new patterns and updates every week, subscribe to my mailing list and never miss a new free pattern again...
Comment: I would love to hear what you think about this pattern, leave a comment below...
Follow me on Pinterest: Make sure you can find this pattern again when you need it, save to your Pinterest board.
Share your photos: I would love to see what you make. Share your photos on Instagram, just tag me @lullabylodge.
Follow me on Facebook: For daily posts, sneak peeks and staying up to date with new blog posts, patterns & tutorials you can find me here.
Join the Facebook Group: Share your makes, get help with patterns, keep up to date with new releases and take part in fun CAL's right here in our Facebook Group.
Join the Ravelry Group: Want to get sneak peeks at patterns before they are released or take part in the testing process? Then join our Ravelry community group.
© 2025 Catherine McLennan, Lullaby Lodge Designs. Originally published 2020. All rights reserved. This pattern is protected by international copyright laws and may not be reproduced, distributed, or sold in whole or in part.
I really like these fingerless mitts and so I might have a go making them. They would be perfect for photo outings!
ReplyDeleteThanks Sandra, yes they would be perfect for that, keeping your fingers free for snapping all your lovely photos...
DeleteThese are super nice!
ReplyDeleteThanks Sara
DeleteThank you for this super clear tutorial. I'm a brand new crocheter and this pattern with the helpful, clear images is gold for people just starting out like me. Looking forward to making these cute mits!
ReplyDeleteThanks so much Karen, I hope you enjoy making them.
Delete