Showing posts with label Edgings. Show all posts

Saturday 1 February 2020

Iris Stitch Edging - Add this pretty Iris Stitch border to your blankets...

For those of you who know me well, you will know that making blankets is my most favourite thing and adding the border to a finished blanket is the best part of blanket making.  Don't get me wrong I love the whole process.  Choosing the design, colours, type of yarn, spending time all snuggly and warm with a growing blanket on your lap is pure bliss to me, but those final few rounds that add the finishing touch to your masterpiece, is just the cherry on the cake.  I love that feeling of completion  and achievement you get when you finish a blanket.


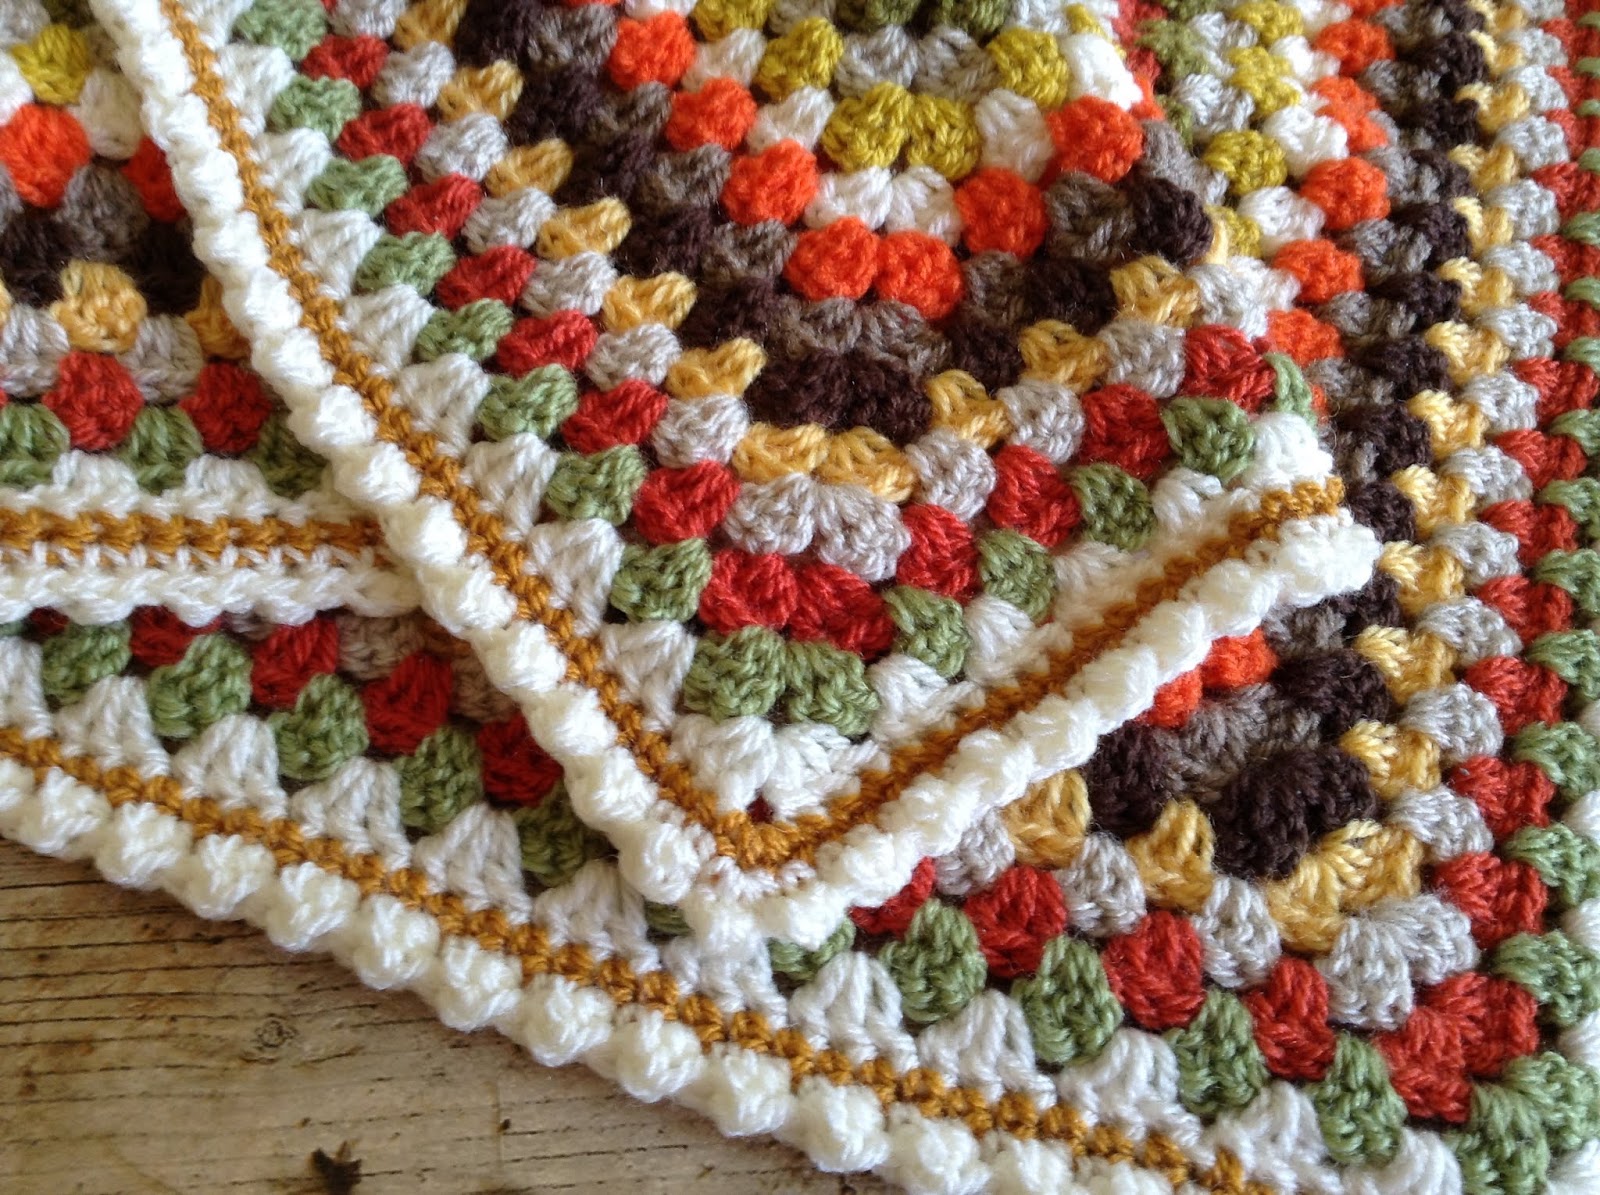
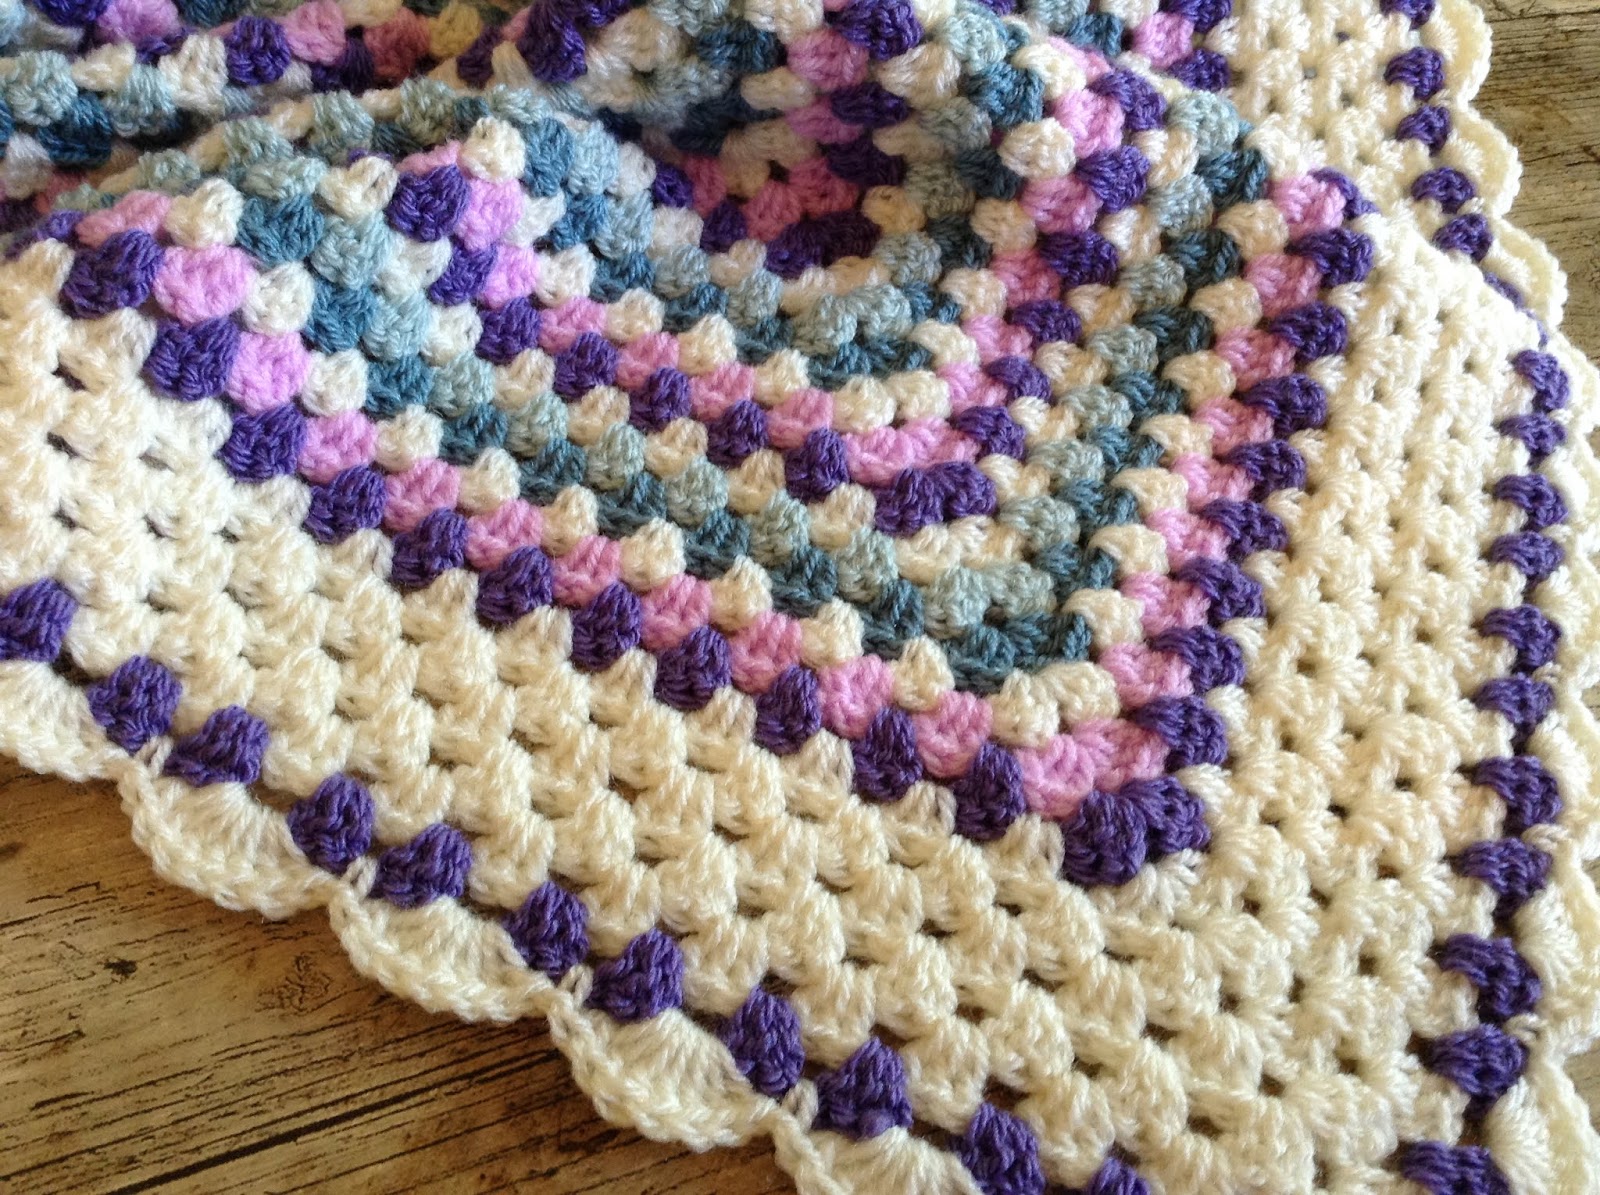
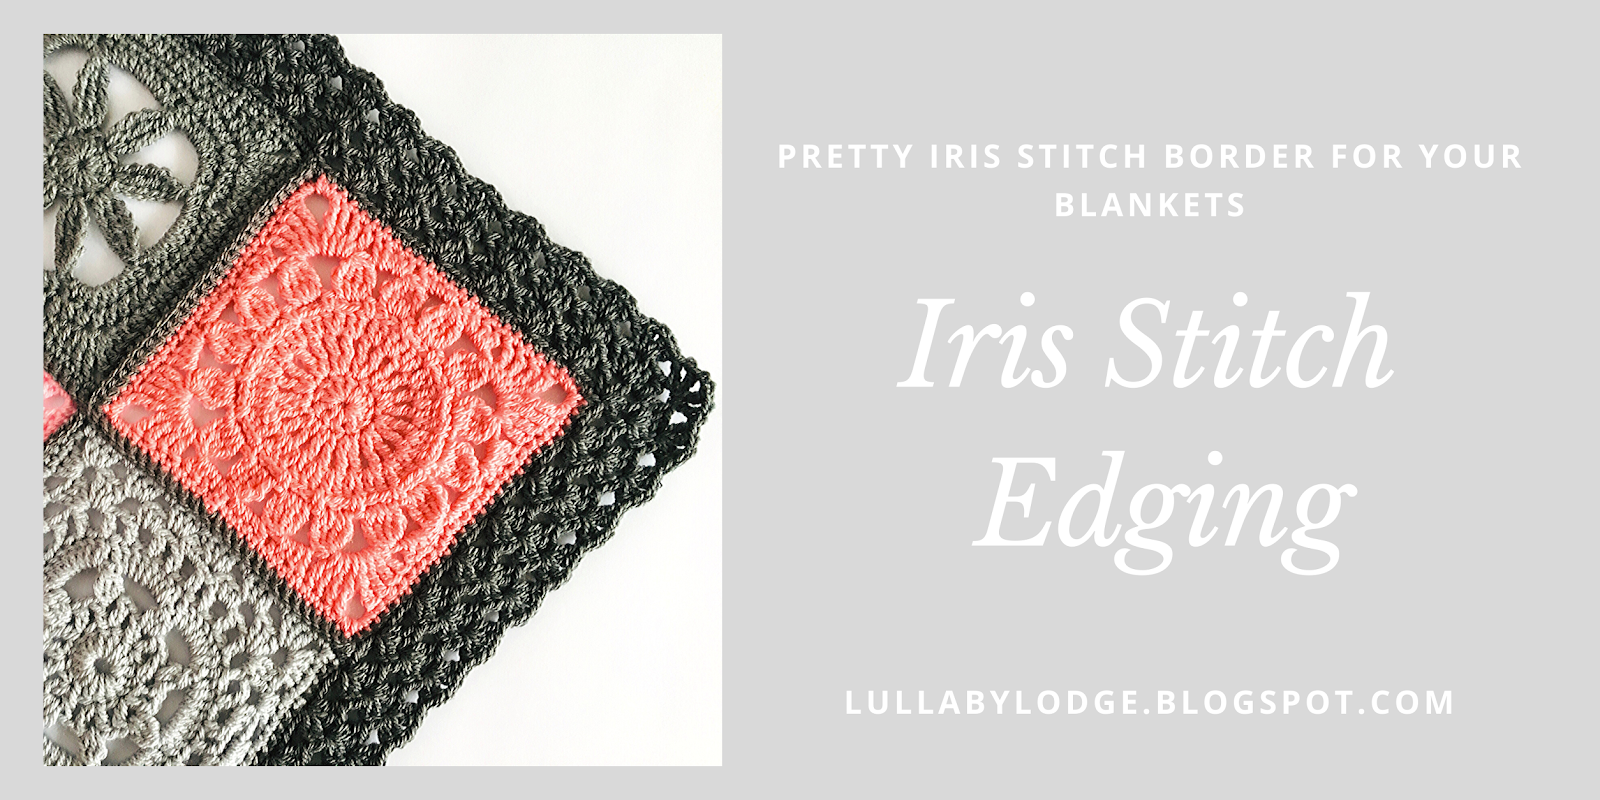
As you know all through January we have been on a stash busting marathon, making a new granny square each day.  Well, all the squares are finished and joined and it's now time for the border.  I wanted something pretty but simple to go with all the floral themed squares.  So I thought the Iris Stitch would make a wonderful edging to my finished blanket and of course I must also share this with you all...


Useful Links...


If you missed our crochet along, don't worry you can still make this beauty for yourself.  Just check out the link above for all the instructions and pattern links to make this pretty, stash busting blanket.
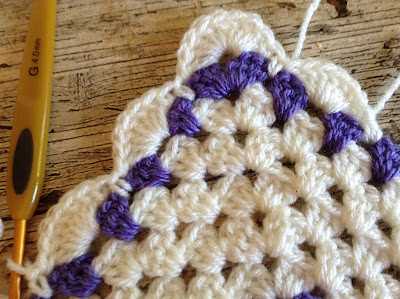


Iris Stitch Edging


Materials

I used a little over 100g of DK for this border, but you will need to use the same gauge yarn that you used for your blanket.  Amounts will vary depending on your blanket size.
Hook, I used a 4mm hook, but you will need to use the hook size you used for the rest of your blanket.
Darning needle

Abbreviations  

US terms (UK conversion)
dc - double crochet (treble crochet)
v st - v stitch
dv - double v stitch
sl st - slip stitch
 ch - chain
sp - space
sk - skip

Special stitches:

V Stitch - [dc, ch1, dc] in same st.

Double V Stitch - [2dc, ch1, 2dc] in same st.


Other notes:  It is my preference to add a round of single crochet to my blankets before I start my border.  This gives me an even base to start from and the opportunity to correct stitch counts if necessary.  The Iris Edging is worked over multiples of 4 stitches +3.  If you wish, you may during the single crochet foundation round, increase or decrease stitches so that each side of your blanket has the correct multiplier (don't count corner stitches).  This involves lots of counting and Maths (eek!).  If like me you cannot be bothered with this, feel free to fudge it.


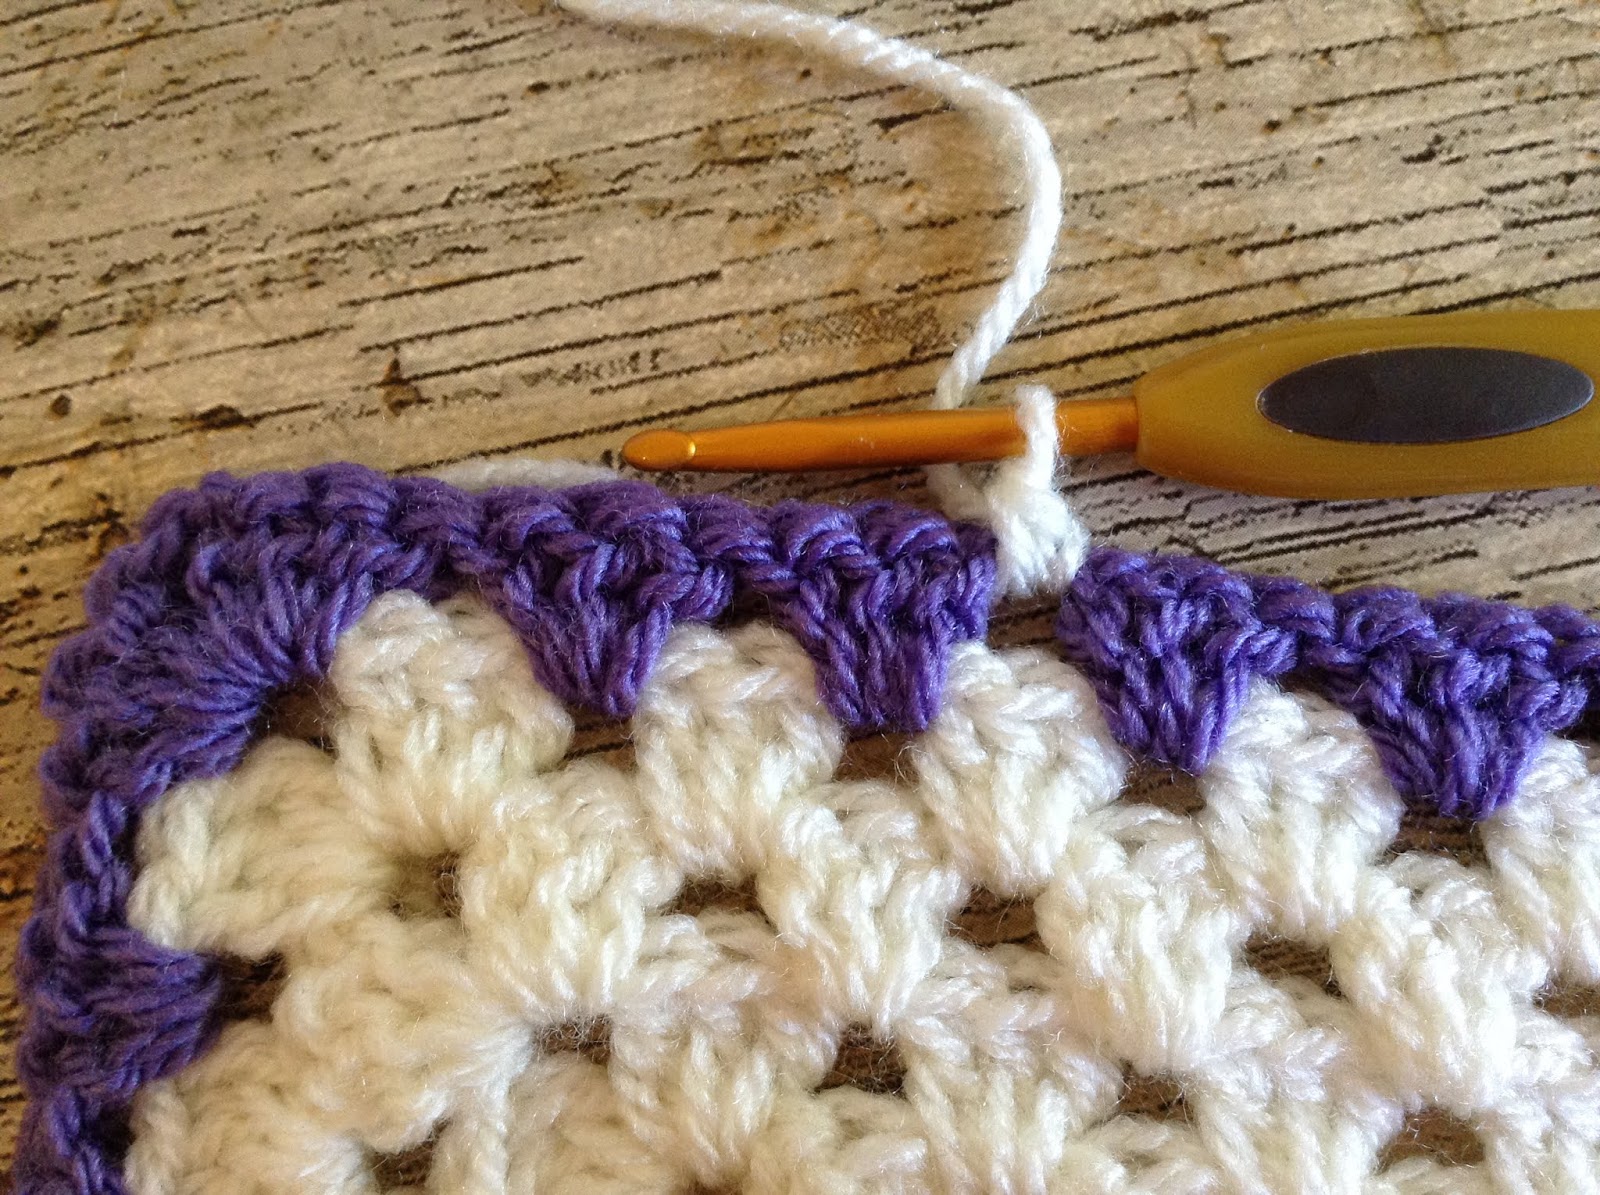
Round 1 (Foundation round) starting in a corner st, join yarn and ch1, [sc, ch2, sc] in same st, then sc evenly around your blanket with [sc, ch2, sc] in each corner, join with sl st.  


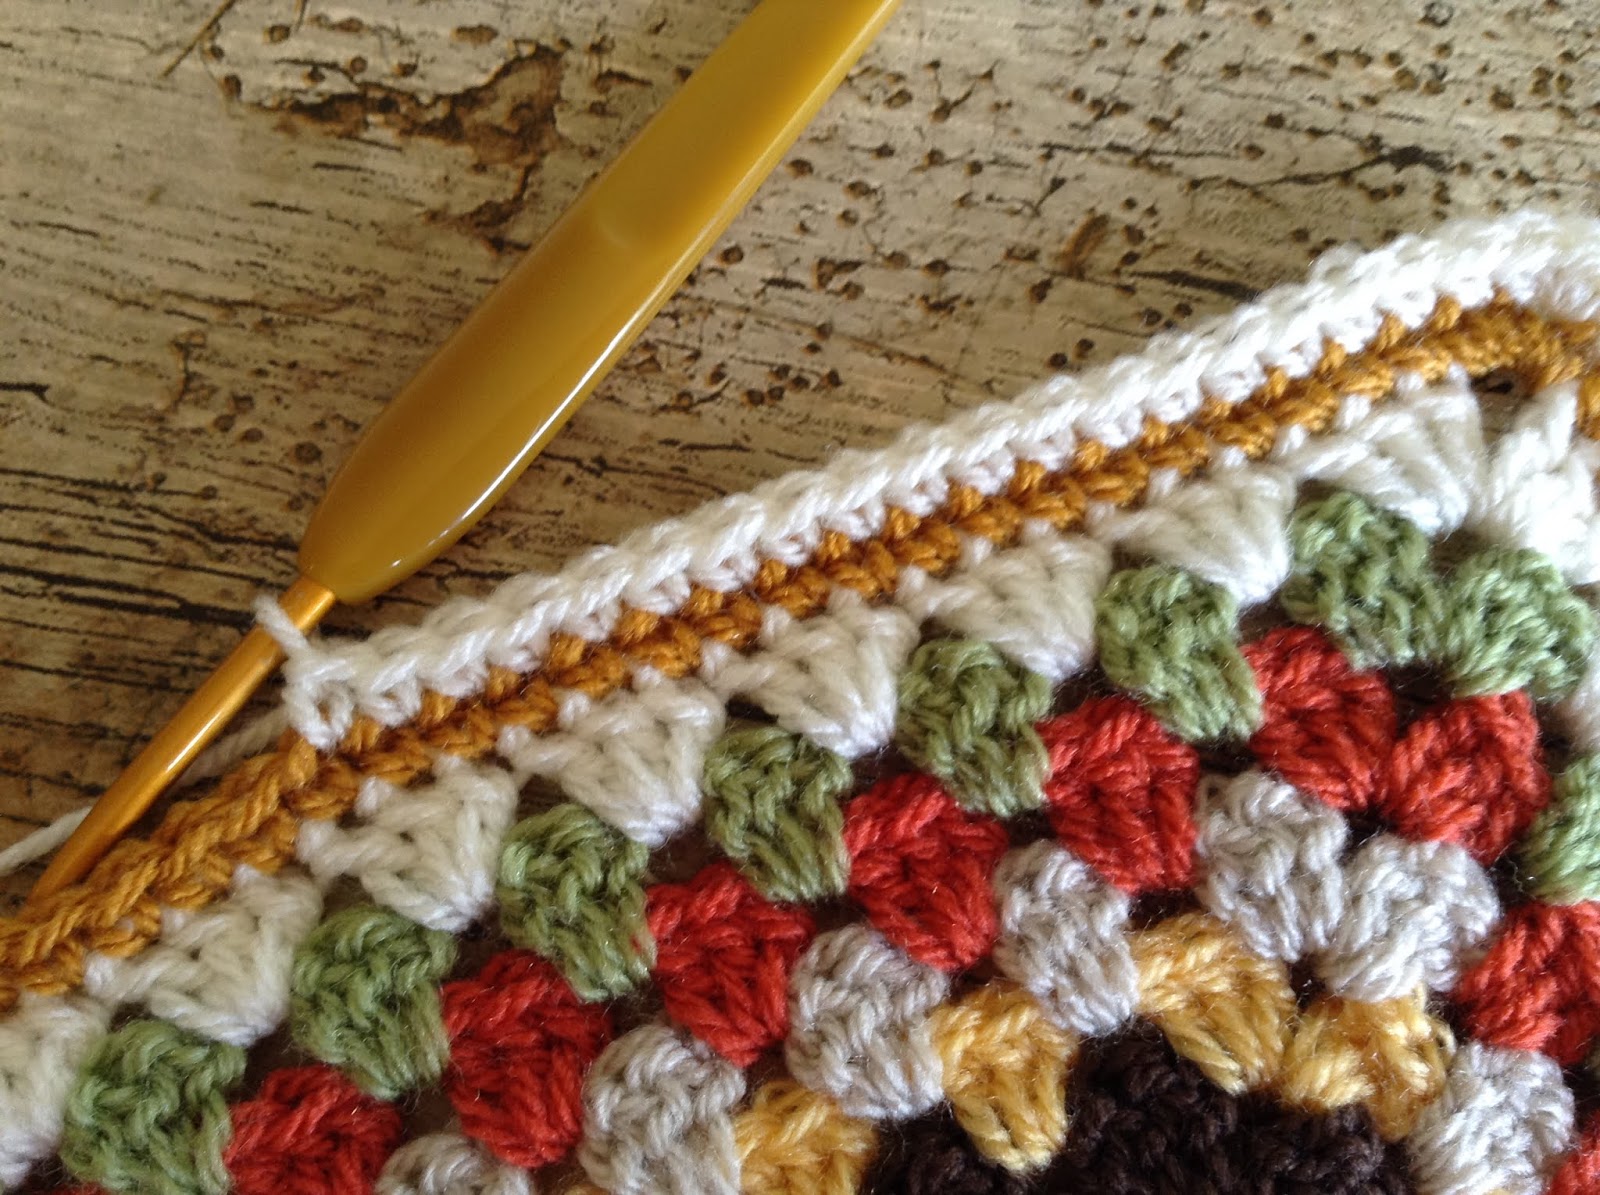
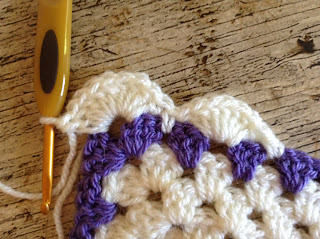
Round 2 Sl st into corner sp, [ch3 (counts as dc), ch1, dc, ch2, v st] in same sp, *[sk next 3sts, dv in next st] repeat across, sk last 3 sts, [v st, ch2, v st] in corner* repeat from *to* 3 times, [sk next 3 sts, dv in next st] repeat across, join with sl st to top ch3.

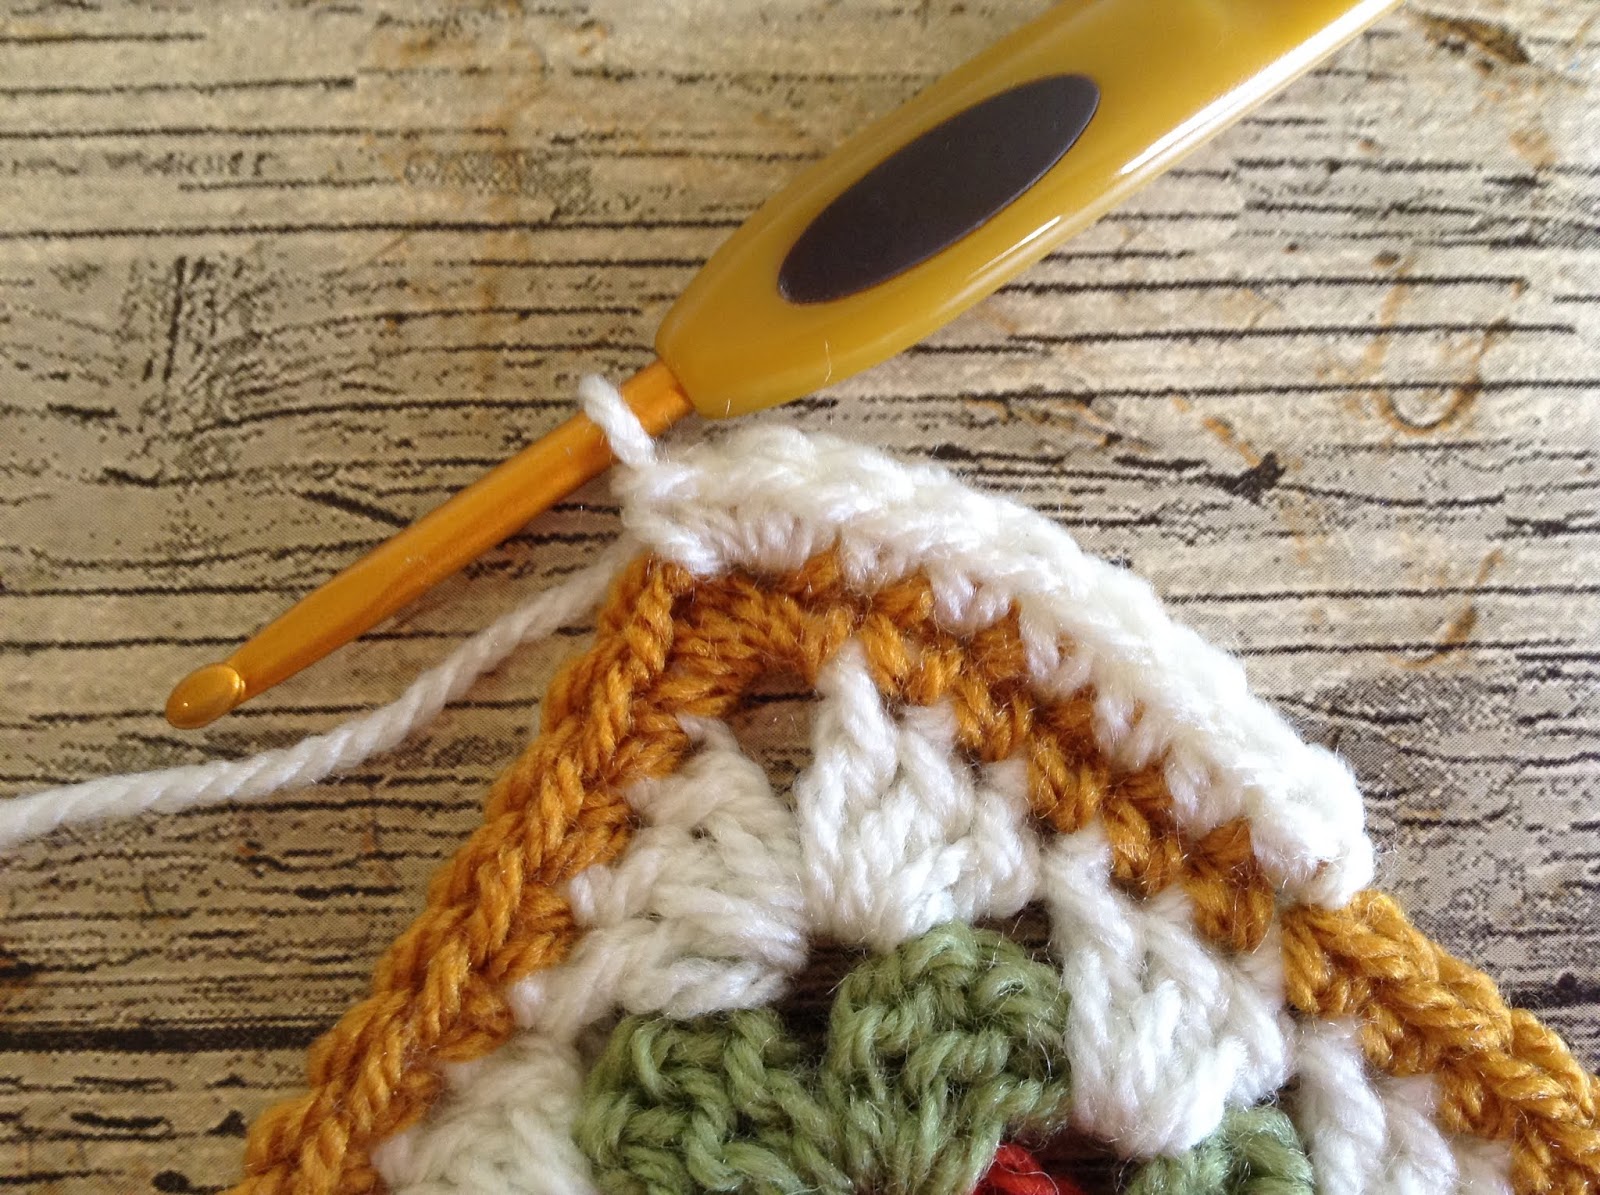
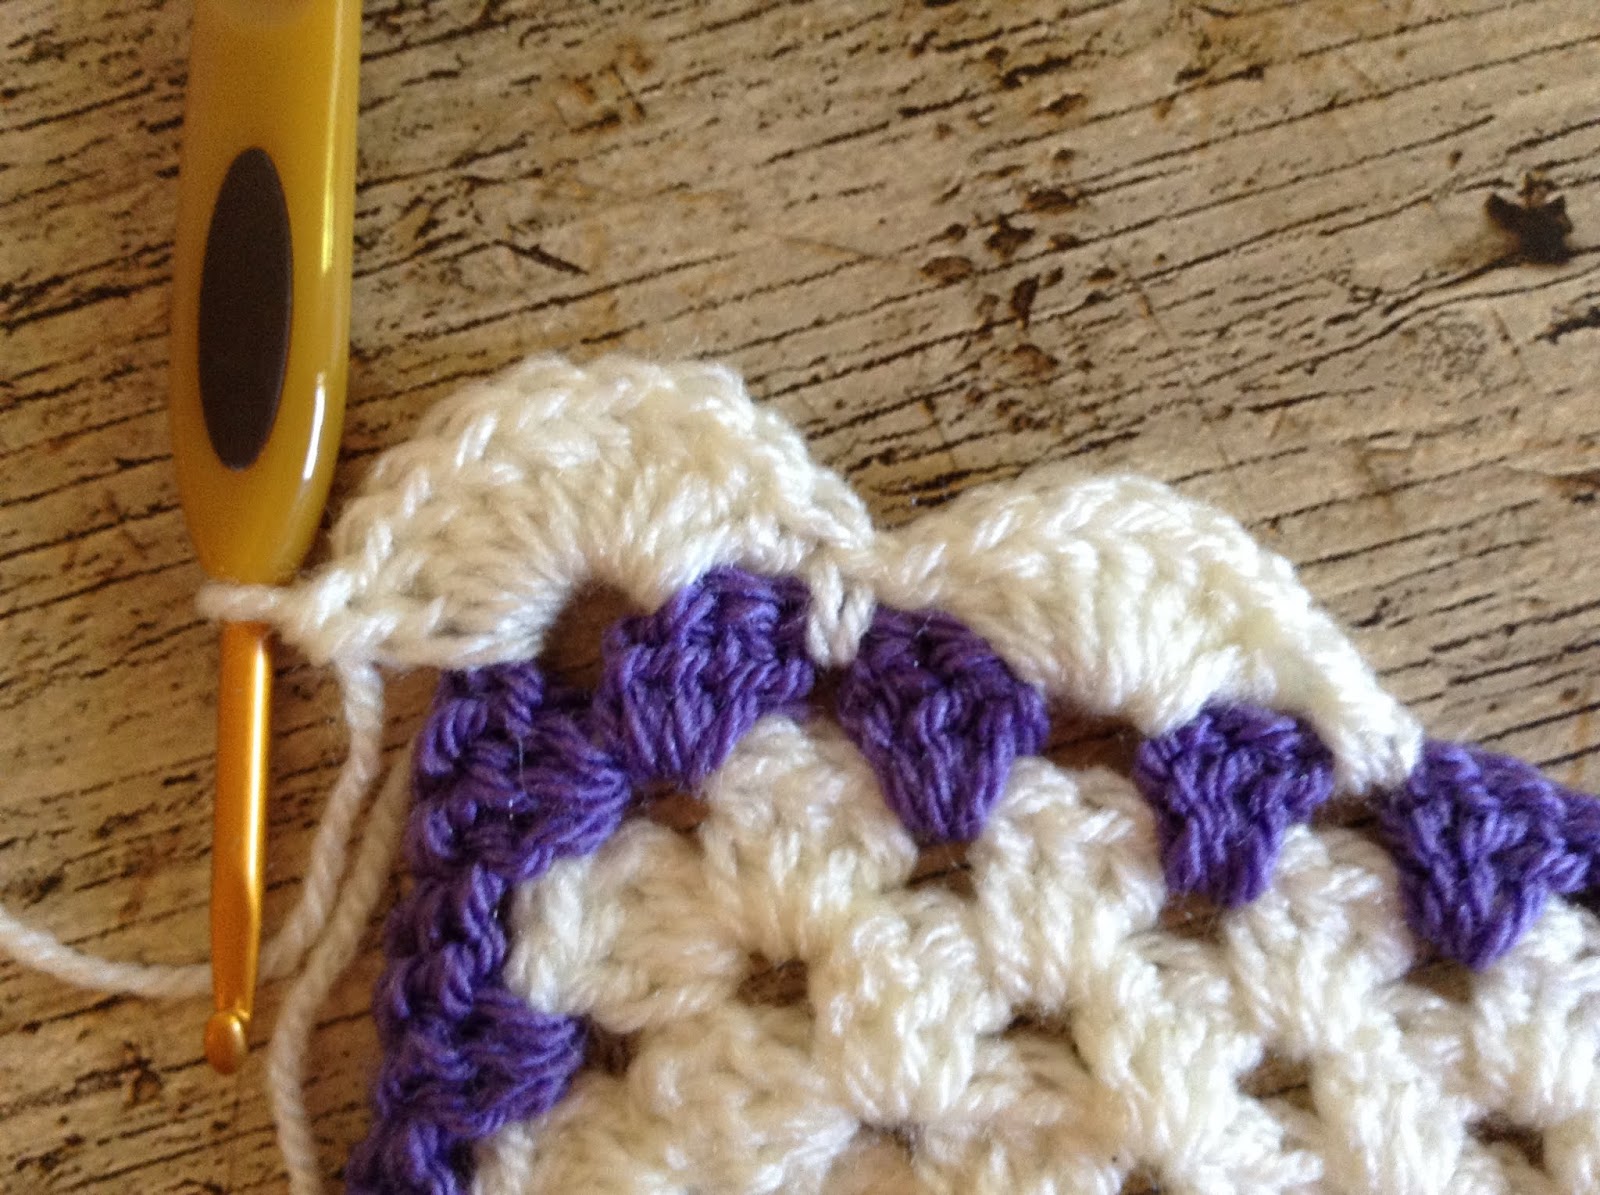
If fudging, at the end of this round you may need to sk 2 or 4 sts depending on your st count.  As you can see here in the photo, I skipped only 2 sts before the corner and it really isn't noticeable.


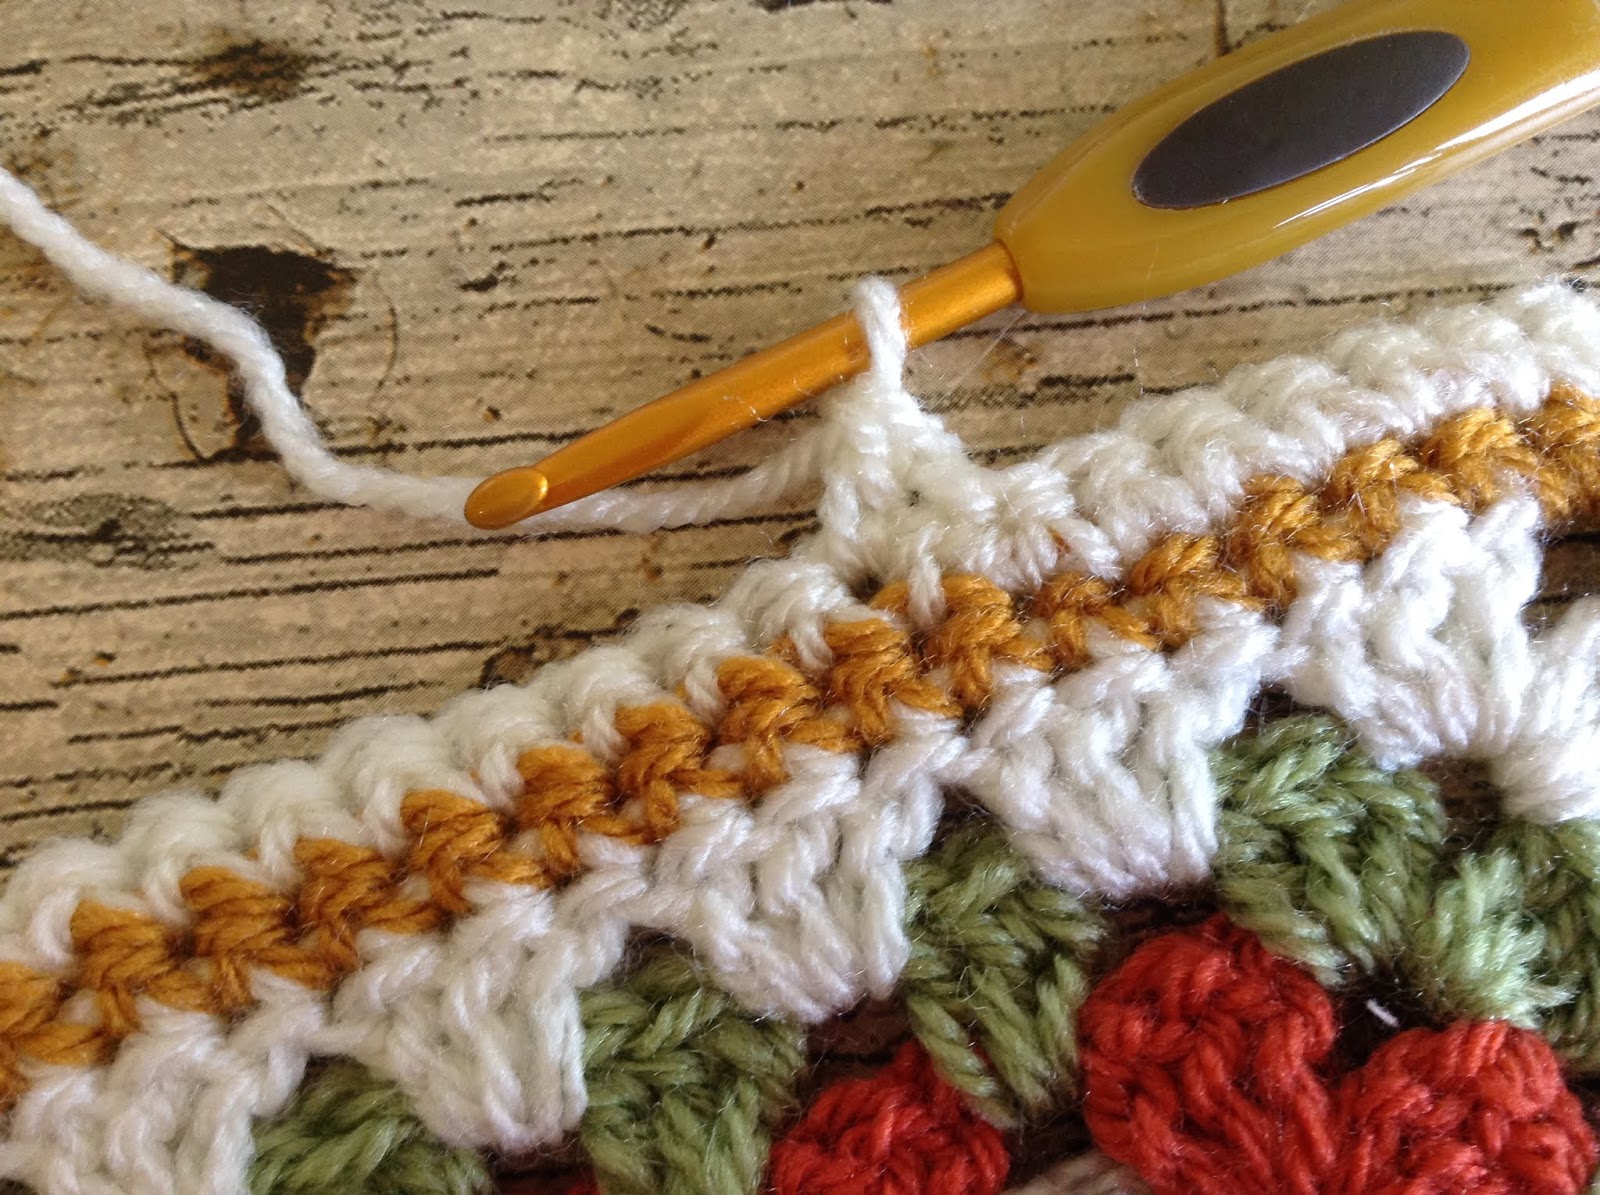
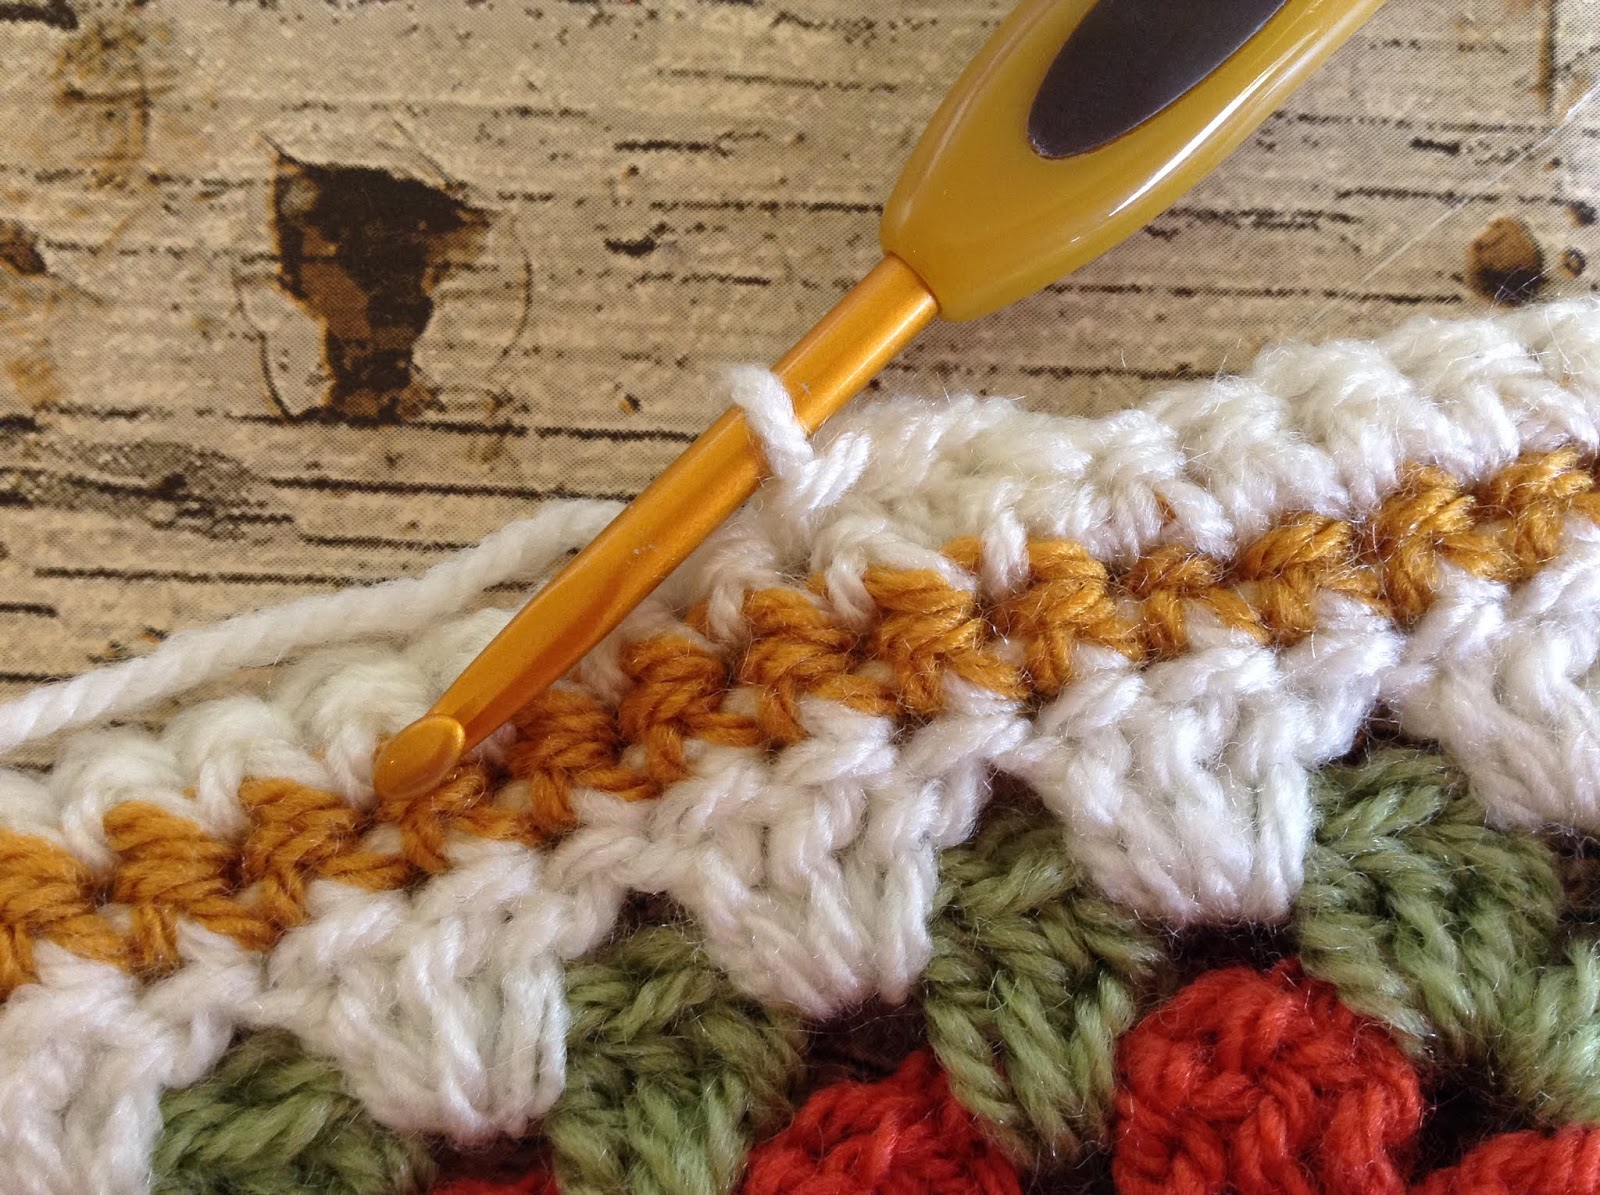
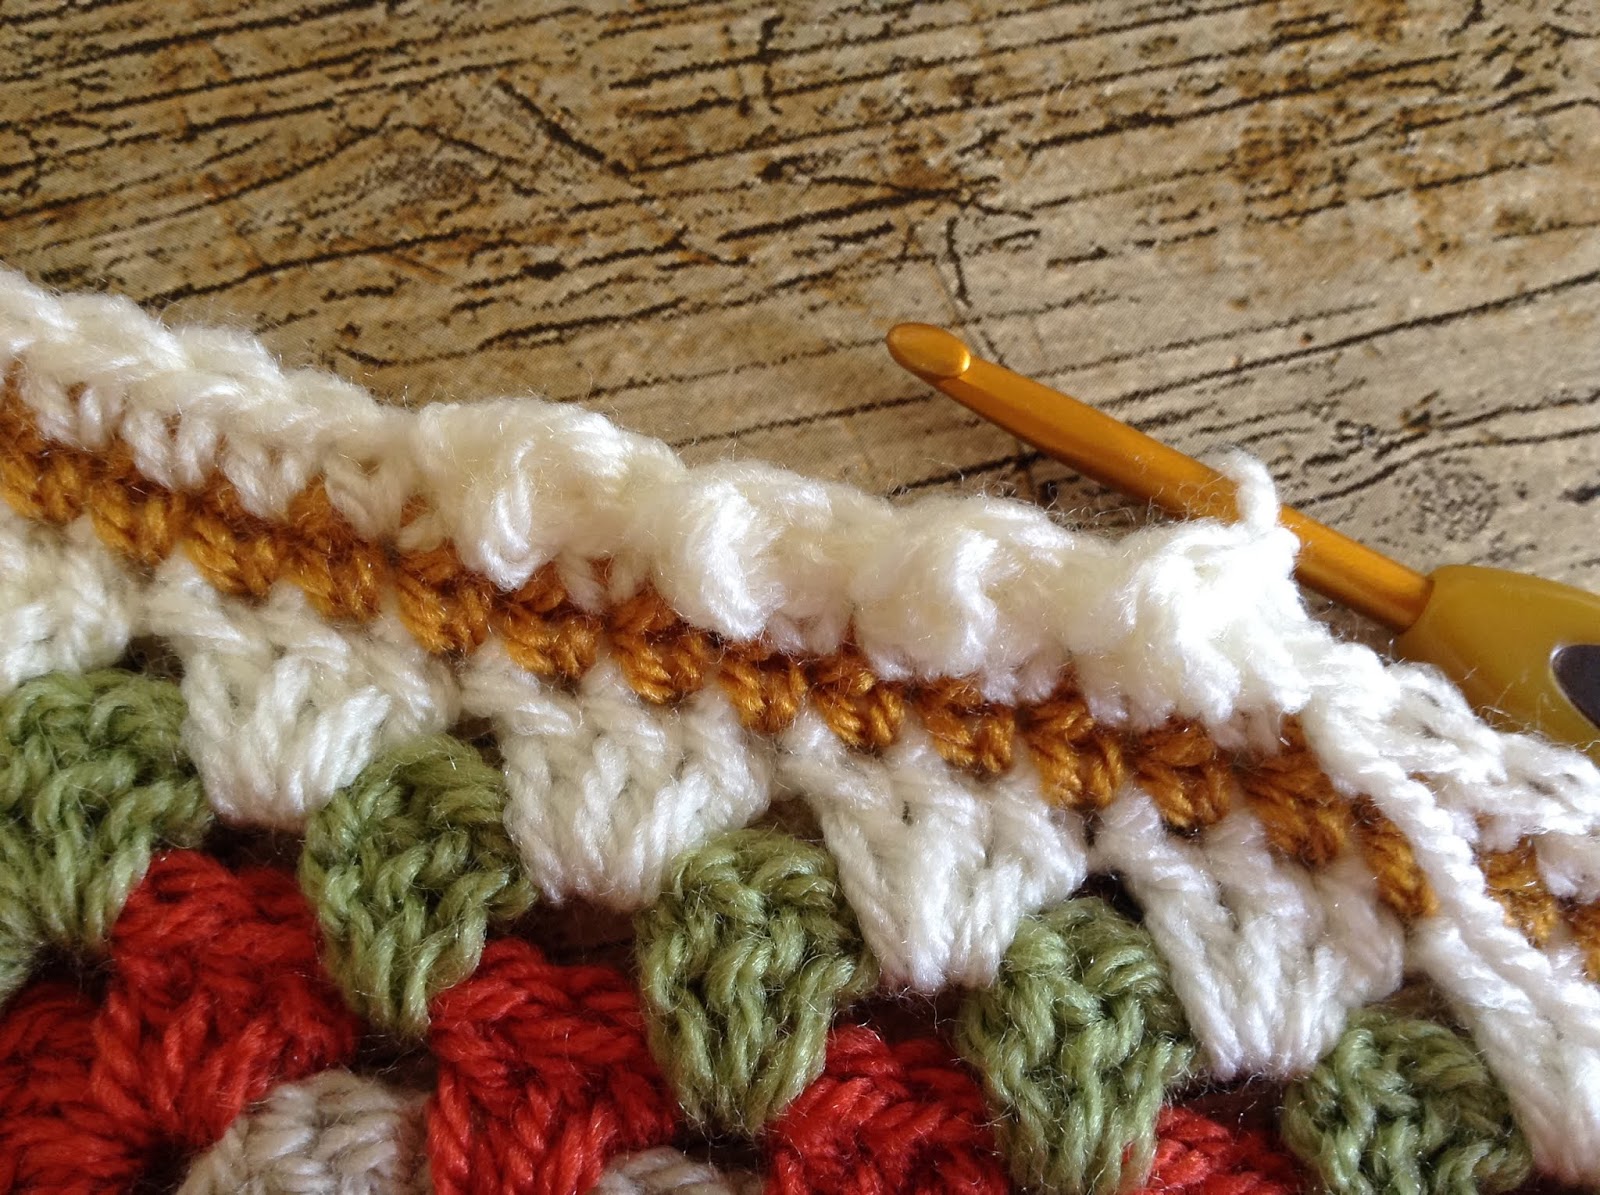
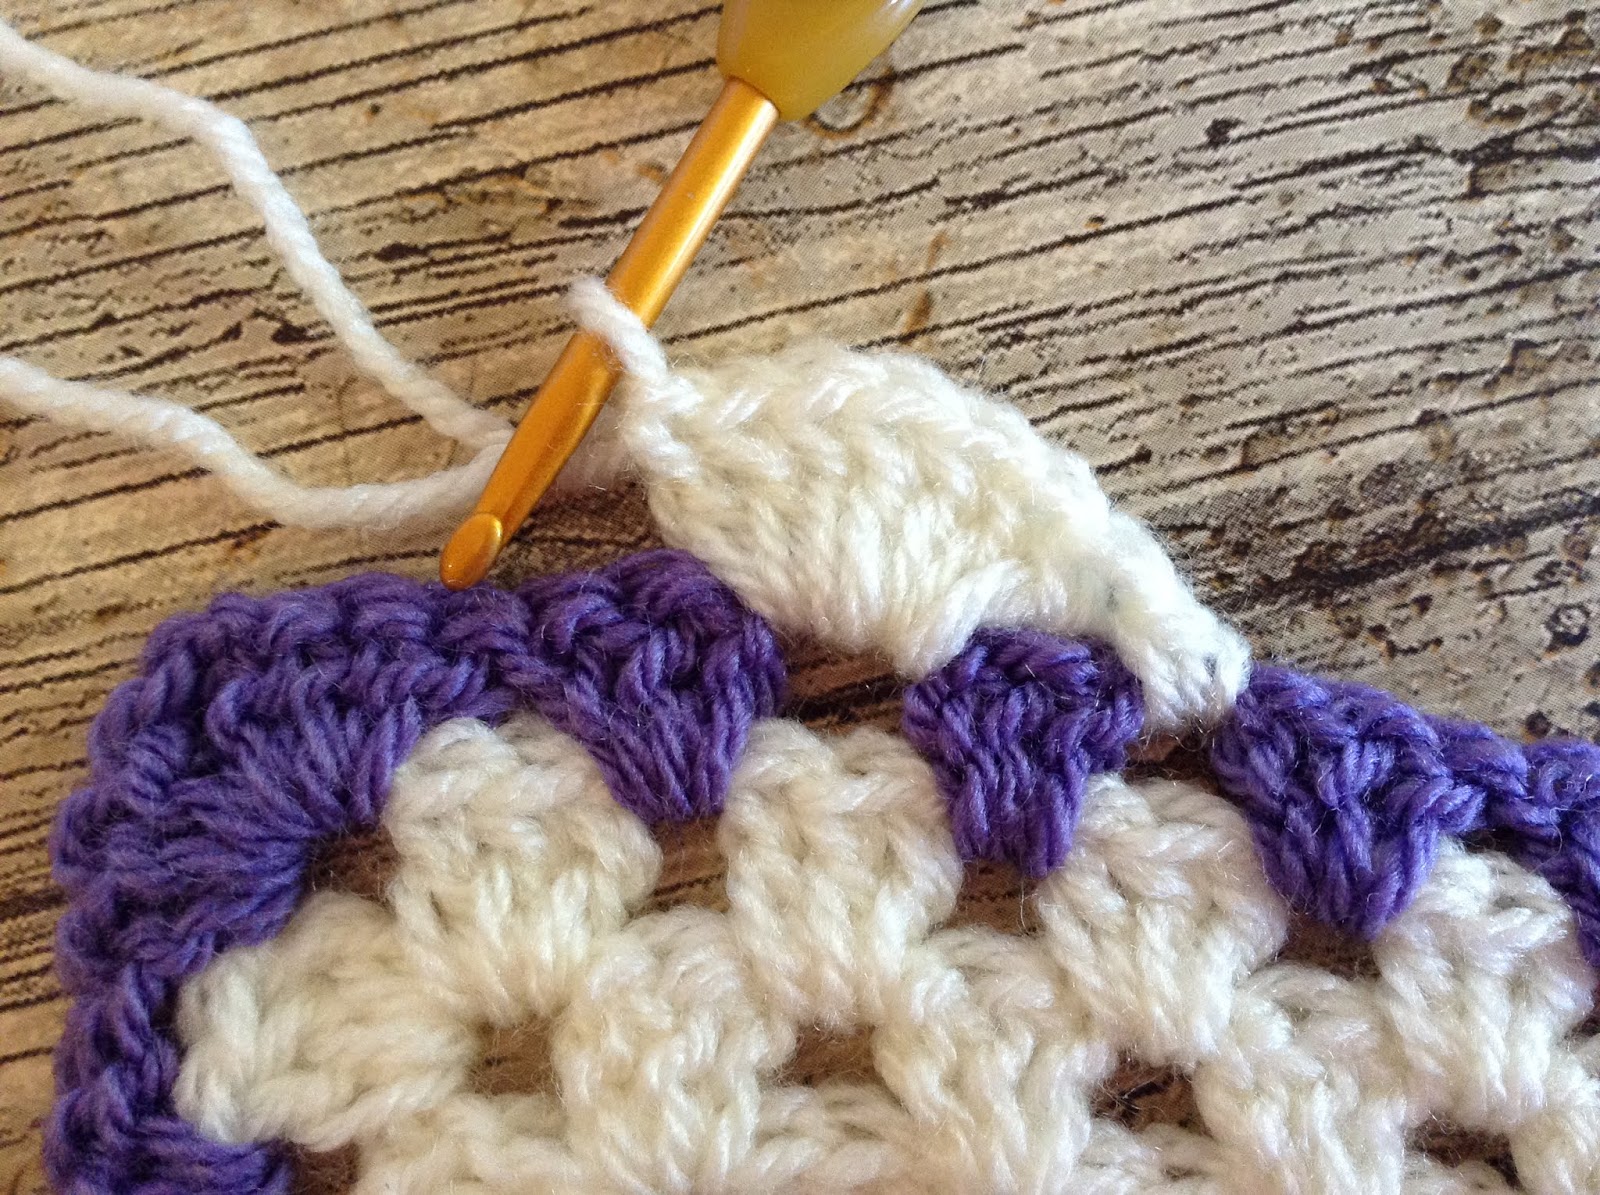
Round 3 Sl st into ch1 sp, [ch3, dc, ch1, 2dc] in same sp, in next and every corner sp [dc, ch2, dc], dv in every v st and dv from previous round, join with sl st to top ch3.


Rounds 2 & 3 form pattern and may be repeated until border is desired width.


Pin it for later...


Thanks for stopping by and I hope you liked this pretty edging.  Be sure to subscribe for more posts like this...

TTFN
Catherine
x


If you really enjoy the content at Lullaby Lodge, you might like to become a premium subscriber.  Check out my Patreon page for more details...


Related posts...


This post contains Amazon affiliate links...


Tuesday 28 May 2019

Crab Stitch Edging - Learn how to add a finishing touch to your projects with this tutorial by Lullaby Lodge.

One of my favourite things to crochet is blankets.  I just love the whole process from start to finish.  Scouring the internet for ideas of colours, shapes, texture; choosing yarn and making that first long wiggly starting chain, working on the body of the blanket, joining motifs, but my favourite part about blanket making is adding the border.  It's that time when your project is almost finished and you can see exactly how your blanket will look.  I love that feeling of completion you get while adding your final rounds.

The style of your blanket will determine what kind of edging you add.  I have used fancy, lace edgings in the past, bobble edgings, pretty shells and I love them all; but sometimes you just want something simple and nothing could be more simple and effective than a crab stitch border.


Crab Stitch Edging


Materials

Yarn
Darning needle

Hook

Use a hook that matches your project and yarn

Abbreviations / Terms

US terms are used through out (UK terms)
sc - single crochet (double crochet)
ch - chain
sl st - slip stitch
st(s) - stitch(s)


I am using a granny square as a sample piece to show you how to work the edging, but you can add your border to any project.  Use the same yarn and hook size that you used for the main body of your project.  First we need to work a round of sc.  

Round 1 join your yarn with a sl st anywhere on your project, ch1 and sc in same st.  Sc in every st.


If your project has corners, 3sc in each corner...


Join with sl st to starting sc.  


We will now work around our project putting a sc in every sc, but this time we will be working from left to right.  This can feel a bit counter intuitive but once you get the hang of it you can get a nice rhythm going.


Round 2 sc in every sc (working from left to right).


Crab stitch will easily go around your corners with no need for extra stitches...


Finish with a sl st to starting sc.


Crab Stitch makes a great edging for ripple blankets as the stitch easily flows along the ridges.


I made this blanket a few years ago and it is still one of our favourites...


Thank you for reading and don't forget to follow (in the sidebar) and subscribe for more posts like this...

See you soon
Catherine
x

Related posts 

The Blanket Stitch


Simple Shell Edging


This post contains Amazon affiliate links...

Friday 4 January 2019

Valentines Crochet Round Up - 10 Free Patterns

No sooner than we have taken down all our Christmas decorations, Valentine's Day is knocking at the door.  I have selected my 10 favourite free patterns.  There is plenty to choose from, gifts for family and friends and maybe something to treat yourself...

What Valentines Day would be complete without a delicious box of chocolates and with the added bonus of zero calories.  Pattern by Michele Wilcox.


Learn a new stitch pattern to create a gorgeous heart blanket or just use the pattern to add a cute trim to other makes.  Designed by Mypicot.


Keep cosy in this lush cowl with adorable heart detail.  
Pattern by Crafts by Amanda.


Decorate your home for the season with this cute wall hanging by Creative Jewish Mom.


Add a crochet edging to these paper hearts and turn them into a gorgeous garland.  Decorate your home or give them as a gift.  Designed by Big A Little a.


Gorgeous daisy grannies joined to make this super cute heart decoration.  Designed by Bauta Witch.


You cannot have valentines day without a pink amigurumi owl!  This cutie is designed by Holly's Hobbies.


Another make to keep you cosy this winter.  A stunning scarlet cowl.  Created by Fiber Flux.


Why not crochet this cosy throw designed by Red Heart.


...and finally this gorgeous hot water bottle will ward off even the chilliest of days.  Designed by Sandra Paul.


I hope you have found something here to make someone you love happy this Valentines...

Happy hooking
Catherine
x


You might enjoy...


This post contains affiliate links.


Sunday 24 June 2018

Cute Bobble Edging - Crochet Tutorial

If you are looking for an edging that is both perfectly pretty and super simple, then this is the one for you.  It's great for those blankets that you want something a little less girly around the edge.  This is one of my favourite go to borders and is so, so simple, making it perfect for beginners.


Abbreviations
US Terms

dc - double crochet
sc - single crochet
sl st - slip stitch

This border requires an even number of stitches around your blanket.  If you have an odd number, simple increase or decrease 1 stitch on the first round.  Or if you are like me just fudge it (it's only 1 stitch).

Attach your yarn anywhere on you blanket with a sc


Work sc's into every stitch along each side and 3 sc into each corner stitch


continue in this way around your blanket and join with a sl st to the first sc


Now turn your blanket over and work from the wrong side, dc in the first stitch and...


sl st in the next stitch


Repeat these 2 stitches around your blanket and join with a sl st to starting stitch.

This is how it looks from the front


The effect reminds me of icing piped around a cake, so cute!


I hope you enjoyed this tutorial and don't forget to share your photo on the Facebook group page.

Take care
Catherine
x

You might enjoy...


This post contains Amazon affiliate links...


Sunday 3 June 2018

How to add a simple shell border to a granny square baby blanket - Crochet Tutorial

A pretty shell border is the perfect way to finish off a crochet project.  You can use it to edge a blanket, a hat or even the cuff of a sleeve...

Simple Shell Edging


Abbreviations
US Terms

dc - double crochet
sc - single crochet
sl st - slip stitch
ch - chain
sp - space

Adding your border to a granny square...

Starting on any odd numbered round, join your yarn with a sc, 3 spaces to the right of any corner,


then work 7 dc into the next sp...


...and sc in the next sp.


Now working into the corner sp.  Into this and every corner make 9 dc...


...and then a sc into the next sp.

Continue in this fashion around your granny square


until you get back to the beginning.  Join with a sl st to you starting sc.

A row of simple shells makes a great edging for a baby blanket...


...and I'm sure you can thing of many other uses for this pretty stitch.
I hope you enjoyed this tutorial.

See you soon
Catherine
x

You might like...


This post contains Amazon affiliate links...