Showing posts with label Kids Craft. Show all posts

Monday 11 November 2019

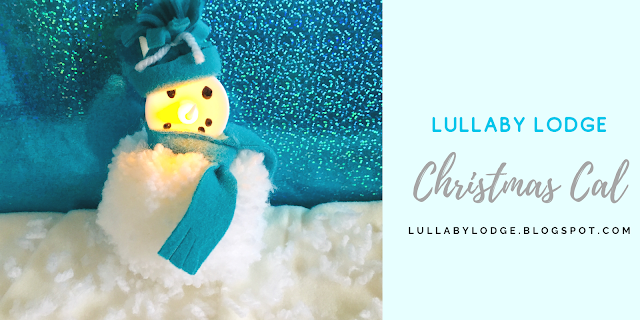
Tea Light Snowman - Time to get crafting with the kids and make this super cute pom pom snowman - Christmas Cal

Hello everyone!  It's time for our second edition of our Christmas craft along and this week it's one for the kids to enjoy.  Little T loved making this super cute, Tea Light Snowman.  This project is great for using up scraps of yarn and fabric and is so simple to make.  This snowman will look adorable hanging from your tree this year.


Tea Light Snowman


Materials

Glue
Black marker
Scraps of fabric
Ribbon


Start by making a large pom pom.  Little T used a Clover Pom Pom Maker for this, but, you can use your prefered method.  There are many videos on Youtube if you have never made them before.  


Make sure you use plenty of yarn so your pom pom is extra fluffy.


Carefully cut the yarn and tie securely.


Trim into shape...


Draw a face on your tea light with a black marker.


Glue to the top of your pom pom


Cut a strip of fabric for the scarf and snip the ends to make a fringe.


Cut another strip of fabric and glue a fold on one side for the brim of the hat.  Cut a fringe along the other side.


Glue the two short edges together and tie a piece of yarn around to make a pom pom hat.


Glue your hat and scarf onto your snowman.  Add a hanging ribbon if you are planning on hanging him from your tree.


Your kids will love making these...


Little T even took some of his own photos...


Pin it for later...


I hope your kids will love making this snowman.  I will be back next week with more Christmas crafts, so be sure to subscribe so you don't miss out.

Happy crafting!
Catherine
x

You might also like...


This post contains Amazon affiliate links...


Sunday 17 March 2019

How to make Paper Flower Embellishments with Punches

This post contains Amazon affiliate links...
Hello everyone.  This weekend I have been enjoying playing with my new toys.  I just bought myself a set of daisy flower punches and they are so much fun to use.  I bought the Vaessen Creative Flower Set from Amazon but there are many other flower punches out there.  The set comprises of 3 different size daisy style punches which can be layered with all different colours and patterns of paper to make beautiful unique paper flowers.

Paper Flowers


Materials

Flower punches in different sizes
Glue
Designer, coloured paper or light cardstock
Mini gems, puffy paint, (you could also use tiny punched circles for the centres).


To use them you simply choose the paper you would like to use and punch out lots of flowers in the different sizes.  You can then layer them if you wish, sticking them together with a little glue.  I added sticky gems or 3D Pearl Paint to make the centres of the flowers.  For a more 3D effect you can curl up the petals with the edge of some scissors or use dimensional foam stickers to attach them to your projects.


If you have children they will love making these (they may need a little help with the punching...)


This is such a great way to use up your paper scraps.


The flowers can be used to embellish many things. Use them for cards, gift wrapping, decorating notebooks the possibilities are endless...


If you would like to have a go at making these I will leave some links at the end for the materials you will need.  I will also link some Youtube videos for more paper flower ideas...

Have a great day!

Catherine
x

Mini Paper Flowers - Alphe Crafts

How to make a daisy flower - ABC TV


Sunday 10 March 2019

Craft Fair Idea #3 Matchbook Notebooks - 2019 Craft Fair Season

Hello friends and welcome back to another instalment of my Craft Fair Series.  This week Little T and I have been making these super cute matchbook notebooks.  They are so much fun to make and feature a really simple design, a great project for getting the kids involved.  I got this idea from Crafty Crafts by Deanna over on Youtube and I will link her video at the end.


Craft Fair Idea #3 Matchbook Notebooks

Materials

Mini notebooks (I got mine from Ebay, they were 8 books in a pack for around £2)
Double sided tape
Designer paper 
Embellishments
Staples
Clearbags (optional)
Bone folder
Paper trimmer or scissors


First you will need to measure your notebooks to work out what size you need to cut your designer paper to.  I used a paper trimmer to cut the paper to size but you could use scissors.  We got our paper pad from The Works, they have a great selection of crafting materials at really great prices.  We used their Ombre designer pad for this project.


You then need to cover your notebooks with the designer paper using double sided tape (I used a tape runner for this).  Our notebooks were not matchbook style so I removed the front cover leaving just the notepad and card backing.


You need to kind of bend your paper around the notebook starting at the area where the papers are glued together.  Use your bone folder to burnish the edges and make nice neat folds.


Once the paper was securely glued on, I added a staple at the bottom in the centre for extra security.  Now you are ready for the fun part, the decoration.  You can embellish these any way you like.  We used some dimensional stickers we got in Poundland and some washi tape.


Little T really enjoyed decorating these, don't they look cute?


To finish them off and for a more professional look we put each notebook in individual clear bags.  You can buy these from many places, I have bought them from Ebay and The Works in the past.

I hope the children will love these at the craft fair and I will be back next week with more craft fair ideas.

Enjoy!
Catherine
x

Crafty Crafts by Deanna - Matchbook Notebooks

This post contains affiliate links...


You might like...


Listen to your favourite books while crafting with an Audible subscription...


You might enjoy...