Showing posts with label Free Patterns. Show all posts

Sunday 14 June 2020

Crochet For A Cause Blog Hop - Free pdf pattern to download every Monday...

Hello friends, this week I am excited to announce that I am taking part in the Crochet For A Cause Blog Hop, which is being organised by the lovely Ashley from Edyth Blayn. 

Each Monday during the event, two designers will make their pattern available to download free. Their pattern will be free for one week only so be sure to check back every Monday.  You can find more information about the cause and links to the free patterns here...

All designers will be sharing hat and scarf patterns with the aim of donating them to your local homeless shelter, school, cancer centre or pregnancy resource centre.  This coming Monday it is my turn to share a pattern and you will be able to download the pdf for my Basic Beanies free for 1 week.  Remember this pdf will only be free for 1 week from Monday 15th June, so be sure to head on over to Ravelry for your pattern.


Click the picture above to find other great patterns, you will need to check each Monday to see what pattern is available for that day.  Click the picture below to get your free pdf of the Basic Beanies pattern.


I hope you enjoy this blog hop and will consider making something for one of your local charities.

Take care for now...

Catherine
x

Sunday 10 May 2020

The Dolly Stripe Blanket - Pretty linen stitch blanket inspired by sweets from my childhood...

Hello friends.  I have a new pattern to share with you today, this pretty striped baby blanket.  The blanket is made from 100% cotton yarn making if perfect for baby in spring and summer or you could make a slightly larger blanket for a throw.  This would make a great picnic blanket if made in a larger size.


The colours I chose for this blanket were inspired by the Dolly Mixture sweets my mum used to buy us when we were children.  If you are from the UK perhaps you had them too.  You could of course use any colours for your blanket, a great opportunity to use up your stash.


Dolly Mixtures...


An ad free pdf version of this pattern is available in my online stores, thank you for supporting my work...


The Dolly Stripe


Materials

Aran / worsted cotton yarn 500g (750m) in white and 20g (15m) each in pink, blue, yellow, green, orange, purple, brown
5mm hook
Darning needle


Size

Appros. 100cm (39 inches) x 70cm (27 inches)


Ability

Easy 


Abbreviations US Terms (UK conversion)

sc - single crochet (double crochet)
ch – chain
sp - space
st(s) - stitch(es)
sl st - slip stitch
sk - skip


Other notes:  Pretty Linen Stitch blanket, the colours in the stripes were inspired by the Dolly Mixture sweets we used to have as a child.  I used Drops Paris to make my blanket in colours, White, Light Pink, Light Turquoise, Strong Yellow, Pistachio, Apricot, Light Purple and Dark Beige. 

When substituting yarns, make sure to choose a yarn of the same weight.  The blanket is worked back and forth in rows.  Change colours by pulling the new yarn through the last stitch of previous row.  Do not fasten off the white, carry up side of work.


Colour sequence (repeat twice)

8 rows white
2 rows pink
8 rows white
2 rows blue
8 rows white
2 rows yellow
8 rows white
2 rows green
8 rows white
2 rows orange
8 rows white
2 rows purple
8 rows white
2 rows brown


With mc, ch 116 (or desired width in multiples of 2)


Row 1 (commence colour sequence) Sc in 2nd ch from hook, [ch1, sk1, sc in next st] repeat to end, turn.


Row 2 Ch2, [sc in next sp, ch1] repeat to last sp, sc in last sp, turn.


Repeat row 2 keeping colours correct, until you have worked through the colour sequence twice, finishing with a final 8 rows in white, or until blanket reaches desired length.  Fasten off and weave in ends.


Linen Stitch Border

The border is a simple round of Linen Stitch.  Join mc anywhere along the top or bottom of blanket, [Sc, ch1] in each sp around the blanket.  In each corner [sc, ch1, sc], join with sl st to 1st sc.  Fasten off and weave in remaining ends.


I hope you enjoy this pattern and I will be back again very soon...

Take care
Catherine
x


If you love Lullaby Lodge and would like to see exclusive content and get pdf versions of my patterns each month, why not become a premium subscriber.  Check out my Patreon page for more details...


You might also like...


This post contains Amazon affiliate links...


Wednesday 22 April 2020

Happy Crochet - Ten quick & easy projects to make while you are stuck indoors..

Hi everyone, we all need a little crochet to stop us from going stir crazy during this time.  So I have conjured up ten quick and easy projects that will put a smile on your face.

The instant gratification of small projects always cheers me up no matter how I am feeling and I am sure we can all do with some colourful, crochet cheeriness right now.  The patterns are all free and have been selected by my favourite designers, I hope you find something you like.


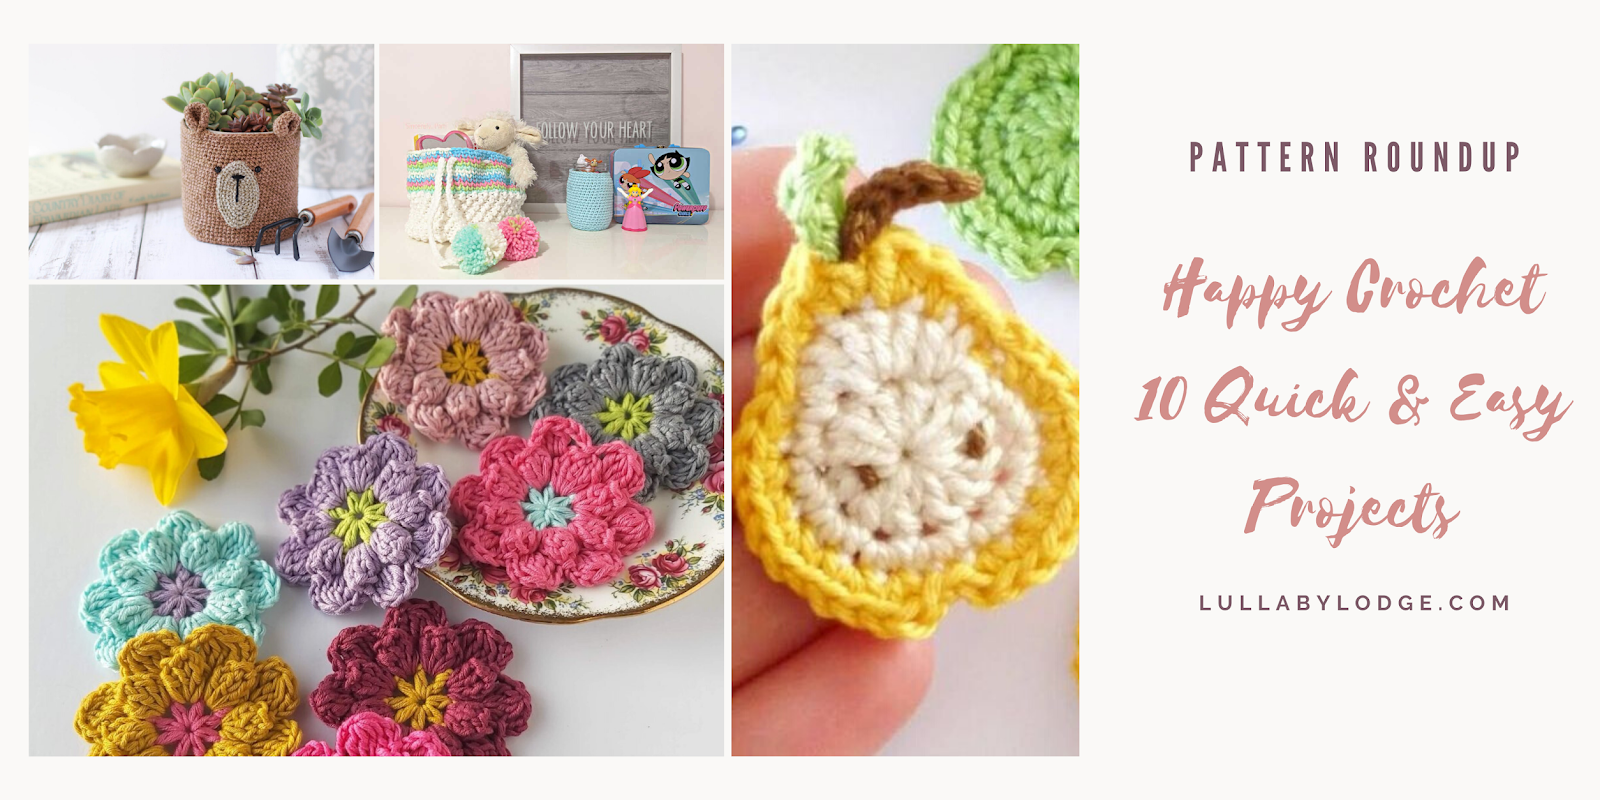
Happy Crochet 10 Quick & Easy Projects


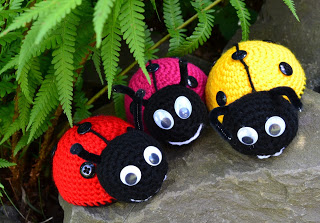
This first project is by my good friend Marjan of Atelier Marie-Lucienne and aren't these guys just adorable.  There is no way you could not have a smile on your face while crocheting up these cute little critters.

Crochet Ladybirds


If you are feeling a little glum, then this gorgeously, colourful, daisy, bunting will certainly cheer you up.  Crochet up a rainbow and hang it in your window and spread the cheeriness.  The pattern is by Crochet Cloudberry.

Rainbow Bunting


Appliques make a great addition to many crochet items.  Add them to hats, cushions, anything you can think of.  These cute little pears are just adorable.  Pattern by Raffamusa Designs.

Little Pear Crochet Applique


Another thing that always make me feel cheery, are handmade wash or dishcloths.  So use up your cotton stash and crochet up these pretty pastel cloths.  Pattern by Crafting Each Day.

Stashbusting Washcloths


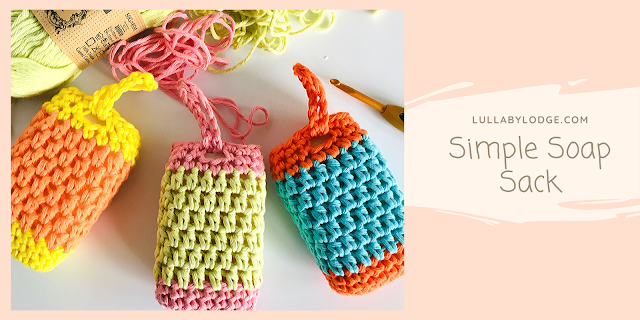
I just love this drawstring bag and wouldn't it make a lovely gift.  The pattern is by Sincerely Pam.

Drawstring Basket


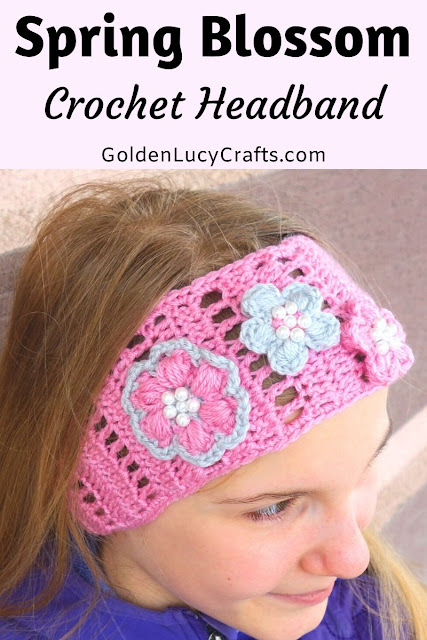
I don't know if you remember but I recently featured a pretty Spring Blossom scarf in a recent roundup by Golden Lucy Crafts.  Here we have the matching headband, a great quick and simple project to make and any little girl would love to wear this pretty floral headband.

Spring Blossom Crochet Headband


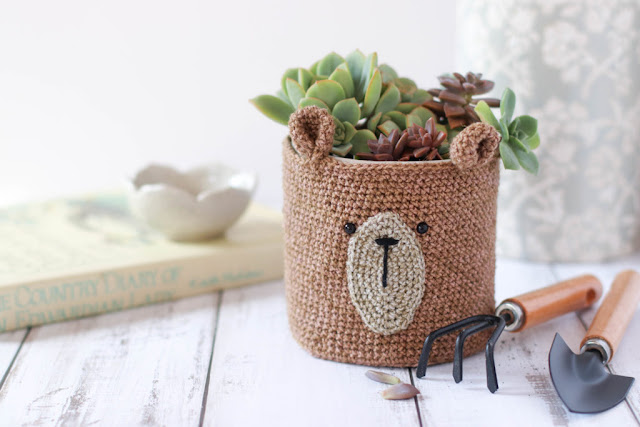
Another adorable make from Thoresby Cottage.  How cute is this little guy?  Give your plants some personality with this crochet teddy bear planter.

Crochet Teddy Bear Planter


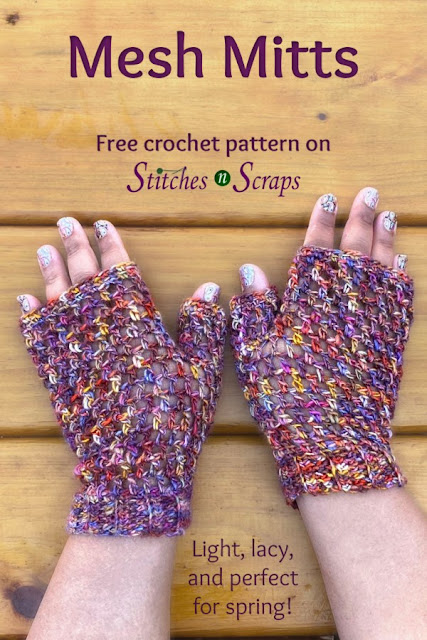
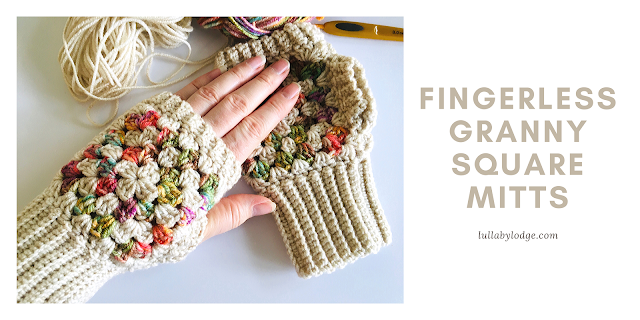
The weather is starting to warm and these crochet mitts are a great in between seasons item and look so pretty crocheted in variegated yarn.  The pattern is by Stitches 'n' Scraps.


Mesh Mitts


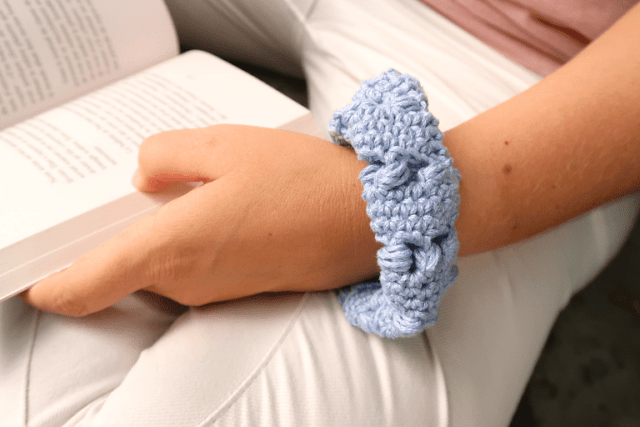
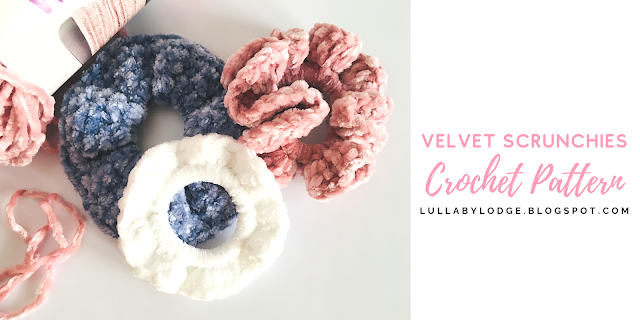
Hair scrunchies are always a great instant gratification project and this pattern by Knitting With Chopsticks includes the design with three different yarn weights, making this great for stash busting.


Summer Berries Scrunchies


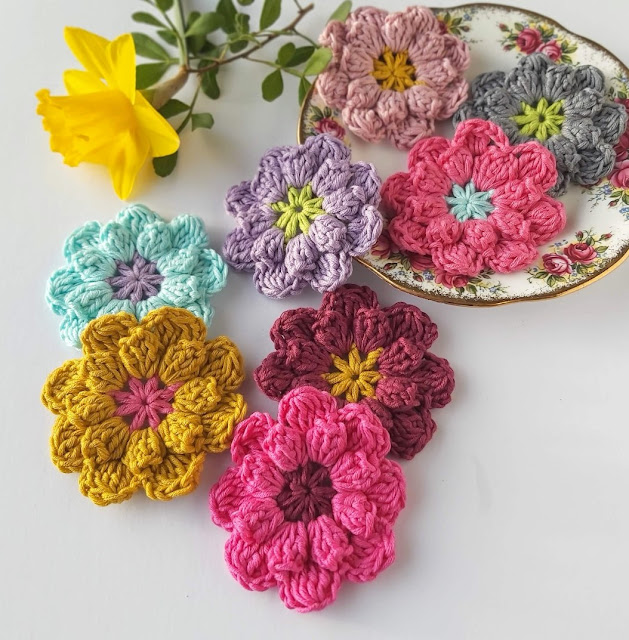
And finally we have these oh so pretty flowers by Annie Design Crochet.  Colourful, crochet, flowers never fail to bring a smile to my face.  I love the colours she has chosen for these beautiful blooms.

Easy Crochet Flowers


Pin it for later...


Well that's it for today's roundup and I will be back soon with more patterns and crochet related loveliness.

Take care

Catherine
x


You might also like...


This post contains Amazon affiliate links...


Sunday 22 March 2020

Granny Square Cowl - Part 4 of our Mini Mother's Day Series

Hello everyone, it's time for our final instalment of our Mini Mother's Day pattern series.  If you are from the UK, happy Mother's Day, take some time out of your day to treat yourself and make this quick and easy cowl.

If you are from the US you still have plenty of time to make this as a gift.  I hope you enjoy the pattern...


You can find part 1 part 2 and part 3 here...


I have used Stylecraft Batik Elements DK in the shade Titanium and matched it with Jarol Heritage DK in Winter White.  Although I have used different colours for some of the patterns, they are all designed to be a matching set and you can of course use the same colourway for each one.


There is an ad free, pdf version of this pattern available in my online stores, thank you for helping to support my work...


Granny Square Cowl


Materials

Stylecraft Batik Elements DK & Jarol Heratige DK (less than 100g in total)
4mm (G) hook & 3.5mm (E)
Darning needle

Size

Adult

Gauge
Not essential for this project

Ability

Intermediate

Abbreviations US Terms (UK conversion)

sc - single crochet (double crochet)
dc – double crochet (treble crochet)
ch – chain
sp - space
st(s) - stitch(es)
sk – skip
bl – back loop
mc – main colour
cc – contrast colour


Other notes:  Alternate between cc and mc each round and join in new colours with a sl st, if you are not changing colour, sl st to corner sp when starting a new round.  Ch3 at start of round counts as dc (you may replace with a standing st or chainless dc if you prefer).
 
Five squares are joined together with ribbing at both edges.  The larger sized hook is used for granny squares and the smaller hook is used for ribbing.


Granny Square (make 5)

With large hook and cc, ch4 and join with sl st to form ring.

Round 1 (Right side), Ch3, 2dc into ring, [ch2, 3dc into ring] 3 times, ch2, join with sl st to top ch3.


Round 2 Join new colour in corner sp, [ch3, 2dc,  ch2, 3dc] in same sp, in next and every sp [3dc, ch2, 3dc], join with sl st to top ch3.


Round 3 Join new colour in corner sp, ch3, 2dc in same sp, ch2, 3dc in same sp, 3dc in each sp across sides, [3dc, ch2, 3dc] in each corner sp, join with sl st to top ch3.


Rounds 4-6 repeat round 3.


Joining squares

With right sides together sc or sl st 4 squares together to form a tube.


Ribbing

Row 1 With right side facing, small hook and mc, attach yarn at any seam with a sl st, ch7, sc in 2nd ch from hook and in each ch,  sl st to next 2 sts along bottom of granny square, turn. (8sc)


Row 2 Sk both sl sts, sc in each st working in bl only, turn.


Row 3 Ch1, sc in each st working in bl only, sl st to next 2 sts along bottom of granny square, turn.


Repeat row 2 & 3 until you have worked around the entire hat.  Do not fasten off.  Turning work inside out, sl st or sc both edges together to join, fasten off.


Repeat ribbing on the other edge of the cowl, fasten off and weave in ends.


Gently steaming the finished piece will make your cowl more flexible and easier to wear (just don't touch the iron to the fabric).


Thanks so much for stopping by, at times like these we all need a little sunshine in our lives and I hope my free patterns will provide you with some much needed joy.

All the best and stay safe...

Catherine
x


If you love Lullaby Lodge, why not consider becoming a premium subscriber and join my other patrons at Patreon...


Related posts...


This post contains Amazon affiliate links...


Sunday 23 February 2020

Granny Boot Cuffs - Make your Mum something fabulous this Mother's Day, Mini Mother's Day Series Part 1

Hello friends.  I wanted to design something quick and easy, that would make a great Mother's Day gift and after making a pair of boot cuffs as part of a weekly CAL on Ravelry, I thought I would have a go at designing my own.  You all know how I love a granny square and putting the two together, I came up with these super cute Granny Boot Cuffs.  Then it occured to me, "why have only one Mother's Day gift idea?", so instead we will be having a mini series of patterns coming out over the next few weeks, so make sure you are subscribed and don't miss out on any posts.


As always an ad free pdf version of this pattern is available in my online stores, thank you for helping to support my work...


Granny Boot Cuffs


Materials

Stylecraft Batik DK in 2 colours
4mm (G) & 3.5mm (E) hook (sizes XS-S, XL)
3.5mm (E) & 3mm (C) Hook (size M-L)
Darning needle

Size

XS-S, M-L, XL

Ability

Intermediate

Abbreviations US Terms (UK conversion)

sc - single crochet (double crochet)
dc – double crochet (treble crochet)
ch – chain
sp - space
st(s) - stitch(es)
sk – skip
bl – back loop
mc – main colour
cc – contrast colour

Sizing:  Measure around your calf to find your correct size (measure the widest part of your calf where you would like the cuffs to sit)Size XS-S will fit 12-13 inches (30 -36cm), M-L will fit from 13-15 inches and XL will fit from 15-16 inches (36-41cm).

Other notes:  Alternate between mc and cc each round and join in new colours with a sl st, if you wish to make in only 1 colour, sl st to corner sp when starting a new round.   Size XS-S, start with mc, sizes M-L & XL start with cc.  Ch3 at start of round counts as dc (you may replace with a standing st or chainless dc if you prefer).  The larger sized hook is used for granny squares and sc edge.  The smaller hook is used for the ribbing.  Photos shown for M-L & XL sizes, there will be no round 4 for size XS-S and you will start with mc for round 1.

Granny Square Make 8

With large hook ch4 and join with sl st to form ring.

Round 1 (Right side), Ch3, 2dc into ring, [ch2, 3dc into ring] 3 times, ch2, join with sl st to top ch3.


Round 2 Join new colour in corner sp, ch3, 2dc in same sp, ch2, 3dc in same sp, in next and every sp [3dc, ch2, 3dc], join with sl st to top ch3.


Round 3 Join new colour in corner sp, ch3, 2dc in same sp, ch2, 3dc in same sp, 3dc in each sp across sides, [3dc, ch2, 3dc] in each corner sp, join with sl st to top ch3.


Round 4 (M-L & XL only) repeat round 3.


Joining squares

With wrong sides together sew or sl st 4 squares together to form a tube.


Ribbing

Row 1 With right side facing, 3.5mm hook and mc, attach yarn at any seam with a sl st, ch15, sc in 2nd ch from hook and in each ch,  sl st to next 2 sts along bottom of granny square, turn.


Row 2 Sk both sl sts, sc in each st working in bl only, turn.


Row 3 Ch1, sc in each st working in bl only, sl st to next 2 sts along bottom of granny square, turn.

Repeat row 2 & 3 until you have worked around the entire cuff.  Do not fasten off.  Turning work inside out, sl st both edges together to join, fasten off.


With mc and large hook, join with sl st to top of cuff inline with back seam.  Ch1, sc in same place, sc in every st across, join with sl st and fasten off and weave in ends.


Make another cuff to match...


I hope you enjoyed this pattern and I will be back very soon...

Catherine
x


If you would like to see even more from Lullaby Lodge, why not consider joining my premium subscription service...


You might also like...