Showing posts with label Free Patterns. Show all posts

Wednesday 19 February 2020

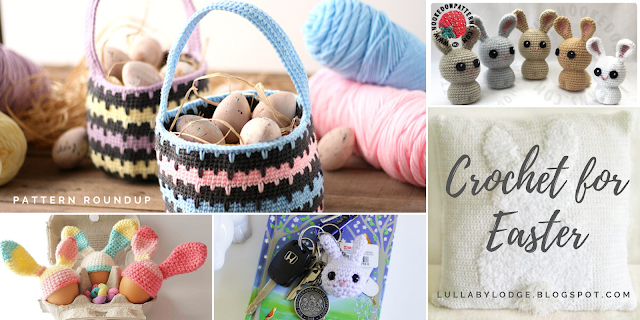
Easter Crochet Ideas - Take a break from all the chocolate and hook up one of these Easter treats...

We are already approaching the end of February, can you believe it?  Where has the time gone?  Well I guess it's time to delve into patterns to make for Easter and I have some beauties to share with you by all my favourite designers.


Easter Roundup


Crochet up this cute and cuddly bunny by 3am Grace Designs.

Easter Peep Kawaii Cuddler


The kids are going to need something to put all those eggs in, so why not make them this super cute Easter basket.  Pattern by Loops & Love Crochet.

Crochet Bunny Basket


More bunnies here, this time teeny tiny amigurumi ones designed by Hooked On Patterns.

Kawaii Bunnies


Crochet up these super cute egg cosies, pattern by Thoresby Cottage.

Crochet Egg Cosy


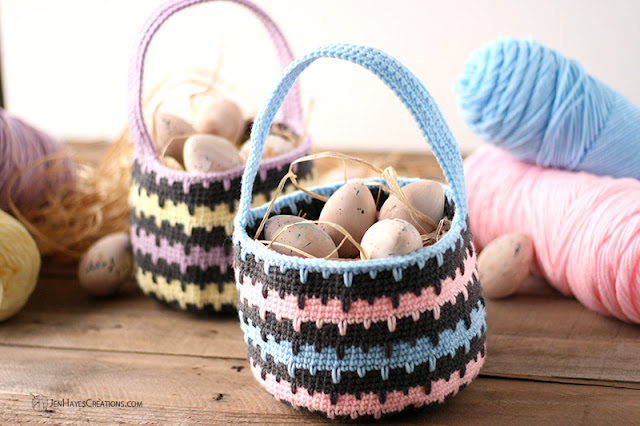
Another Easter basket pattern, I love the spike stitches on this one.  Design by Jen Hayes Creations.

Spike Stitched Easter Baskets


Add some something cute and fluffy to your Easter decor, with this delightful cushion pattern by Crochet Cloudberry.

Fluffy Bunny Cushion Cover


This little cutie is so quick and easy to make and he will help keep your keys safe.  Pattern designed by Modesty by Laura.

Bunny Keychain


Dress up your little one in this adorable bonnet with bunny motifs.  This pretty little hat pattern is designed by Sincerely Pam.

Bunny Bonnet


Lastly we have this adorable little guy, he looks so cute in his little outfit.  This pattern and crochet along can be found at The Loopy Lamb.

Buttons The Bunny


Pin it for later...


Check out this link blast for more Easter crochet ideas...


Thanks for stopping by, I do hope you will check out some of these patterns they are all by really talented designers and I will be back soon...

Don't forget to subscribe!

Catherine
x


You might also like...


Sunday 16 February 2020

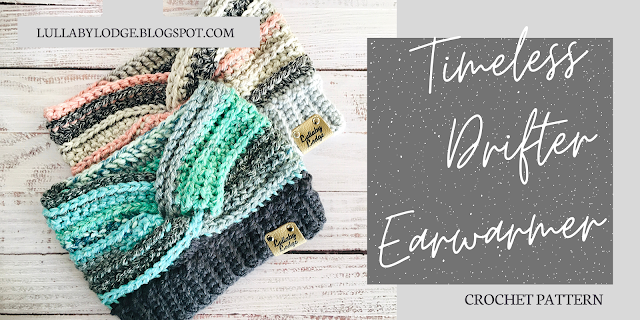
Timeless Drifter Earwarmer - A quick & easy make to keep those ears nice and toasty this winter...

Hello everyone, I really love it when I get to share new patterns with you and I am so excited to share this one.  It's quick and easy to make and is the perfect thing to keep your ears cosy in the last of the winter weather and through spring.  The pattern is also available as an ad free pfd with also contains sizes from baby - large adult, this may be purchased from my online stores.


As a Lovecrafts affiliate I may receive a small commission from qualifying purchases...

Timeless Drifter Earwarmer


Materials

Darning needle
Stitch marker
6mm (J) hook
5mm (H) hook 

Size

Adult (sizes baby - large adult are available in the pdf version)

Ability

Intermediate

Abbreviations US Terms (UK conversion)

sc - single crochet (double crochet)
blsc – back loop single crochet (back loop double crochet)
dc – double crochet (treble crochet)
hdc – half double crochet (half treble crochet) fpdc – front post double crochet (front post treble crochet)
ch - chain
st(s) - stitch(es)
pm – place marker
sk – skip
inc – increase (2sc in same st)


Other notes:  The head band is worked flat and seemed to form the twist.  Ribbing is then added to the bottom of headband, worked sideways, creating the finished ear warmer.

With Drifter and large hook, chain  61

Row 1 (Right side) sc in 2nd ch from hook and in every ch.  60 sts.

Row 2 Turn ch1 (does not count as st), hdc in 1st st, fpdc in each st across until last st, hdc in last st.   60 sts.

Row 3 Turn, ch1, sc in 1st st, sc in each st across.

Repeat rows 2 and 3,  4 more times.  Fasten off leaving a long tail.


Forming the twist

Place piece with right side facing up, in front of you.  Fold short ends in to the centre.  


Fold each short end in half and slot together. 


Sew through all 4 layers securely 


Pm where 2 sides cross over on bottom of headband (through both layers).  


Using Timeless join yarn in centre back, bottom of headband.

Round 1 Ch1, sc in same place, sc in each st around until 2 sts before marker, sk next st, [dc, 3hdc, dc] all in marked st, sk next st, sc in each remaining st, at the same time inc evenly around until you have  66 sts, join.


Ribbing

With small hook ch  9

Row 1 Sc in 2nd ch from hook and in every ch, sl st in next 2 sts on hairband.

Row 2 Turn, sk sl sts, blsc in each sc across.

Row 3 Turn, ch1, blsc in each sc across, sl st in next 2 sts on hairband.

Repeat rows 2 and 3 around hairband until all sts have been worked, fasten off and use tail to sew ribbing together.  Weave in any ends.


Looks great in different colours...


Pin it for later...


I hope you enjoyed this pattern and be sure to subscribe if you did, I post every week with free patterns, reviews and more...

See you soon
Catherine
x


If you love the content here at Lullaby Lodge and would like to see more, why not consider joining my premium subscription service and become a patron...


You might also like...


Sunday 12 January 2020

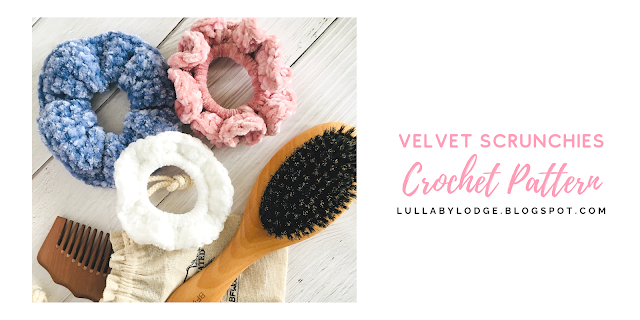
Velvet Scrunchies - Transform plain hair ties into these pretty, plush, scrunchies...

Hello friends.  This week I have a super quick and easy project to share with you.  Yes I know I have been going a little velvet crazy, but I just love Bernat's Velvet yarn.  This is the perfect project to use up all those scraps and with just a small amount, your hair ties are transformed into these gorgeously, squishy, Velvet Scrunchies.


Velvet Scrunchies


Materials

Bernat Velvet (small amounts)
Darning needle
Stitch marker
Hair ties


Hook

6mm (J)

Abbreviations US Terms (UK Conversion)

sc - single crochet (double crochet)
hdc - half double crochet (half treble crochet)
dc - double crochet (treble crochet)
ch - chain
st(s) - stitch(es)
pm - place marker


White Scrunchie


Round 1 Sc around the hair tie until you can’t fit any more sts.  Remember you will be stretching the tie so you need enough sts to allow for this.  When stretched the hair tie should still be completely covered.  Join with sl st.


Round 2 Ch 1, hdc in each st, join with sl st, fasten off and weave in ends.


Blue Scrunchie


Working in a spiral, chain 46 and join with sl st.

Round 1 Ch1, sc in each ch around, do not join, pm in 1st st.

Round 2 Sc in each st

Repeat round 2 until desired width, (I made mine with 8 rounds in total).


With right side facing, wrap crochet around hair tie and crochet together.  Sc in each st around working through bottom and top together.  Fasten off and weave in ends.


Pink Scrunchie


Round 1 Sc around hair tie until you can't fit any more sts.  Remember you will be stretching the tie so you need enough sts to allow for this, the more you can fit in the more ruffely your finished scrunchie will be.  Join with sl st.


Round 2 Ch2, 3dc in 1st st and in each st around, join with sl st, fasten off and weave in ends.


A pdf version of this pattern may be purchased in my Etsy Store...


Pin it for later...


I hope you enjoyed this pattern and I will be back soon with more crochet to share with you, so make sure to subscribe so you don't miss any posts...

Take care!
Catherine
x

If you love Lullaby Lodge why not become a patron and join my premium subscription service...


You might also like...


This post contains Amazon affiliate links...


Sunday 22 December 2019

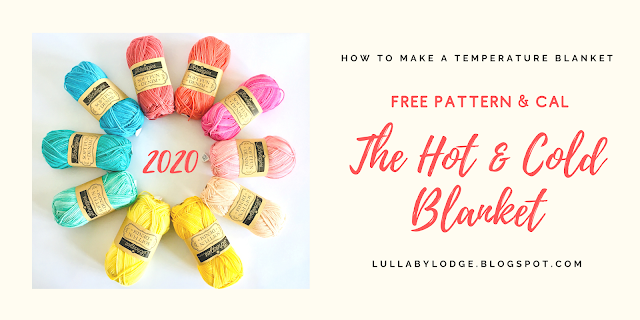
The Hot & Cold Blanket - Join me in 2020 for a temperature blanket crochet along...

So you want to make a temperature blanket?  Well you have come to the right place.  We will be starting a new crochet along in 2020, with a brand new blanket design.  If you took part in this years crochet along, then you will be well on your way to completing your blanket.  If you didn't then you can read all about it here...  So what's new this year?  New colours, new design and a different approach to choosing temperatures, I give you, The Hot & Cold Blanket.


For those of you that have never made a temperature blanket before, the concept is simple.  You allow the daily temperature, to dictate what colour you will add to your blanket on that day.  There are many different styles and patterns to choose from.  Our pattern for 2019 was a stripy blanket, in Linen stitch using 20 different colours.  This year I will be using only 10 colours, with 1 extra colour for joining.


Hot And Cold Blanket


Abbreviations

US Terms (UK conversion)
dc - double crochet (treble crochet)
sl st - slip stitch
ch - chain
sp - space


Materials

DK yarn in chosen colours
4mm (G) hook
Darning needle

I am using Scheepjes Softfun Denim in colours 500, 517, 516, 518, 520, 507, 504, 503, 505, 514 and Scheepjes Softfun 2510 for joining.  Don't you just hate it when yarn companies don't bother to name their colours?  This particular yarn is delicious though so I'll forgive Scheepjes just this once.  It's a mix of cotton and acrylic and is very soft.  I love the slight variation in colour throughout the yarn and am really looking forward to hooking this up.


This chart shows my chosen colours and allocated temperatures for 2020.  Depending on where you live, you might want to adjust the temperature range and colours.


Each day you will check your local weather station for both your highest and lowest temperatures of the day.  We are going to be making 3 round granny squares.  The first round will be your coolest temperature of the day, the second your highest and the third round will be your joining colour.  I recommend the join as you go method for this blanket.


Granny Square

Ch4 and join with sl st to form ring

Round 1 Ch3, 2dc into ring, ch2, [ 3dc into the ring, ch2] 3 times, join with  sl st to top  ch3 and fasten off if you are using a new colour for next round. 


Round 2  Join new colour in any corner sp (or sl st to corner sp if working with same colour), ch3, 2dc into same sp, ch2, 3dc into same sp (corner formed), [ 3dc into next sp, ch2, 3dc into same sp] 3 times, join with sl st to top ch3 and fasten off.  


Round 3  First square only, with joining colour, join in any corner sp, ch3, 2dc in same sp, ch2, 3dc in same sp, [3dc in next sp, 3dc in next sp, ch2, 3dc in same sp] 3 times, 3dc in next sp, join with sl st to the top ch3 and fasten off.  


Round 3 Subsequent squares, complete using the join as you go method...


Join squares diagonally from corner to corner using the formula below.  Day 7 will be next to day 4 and so on...


The finished blanket will be 19 x 19 squares, making a total of 361.  We will use the last 5 day's colours to add to the border.


I will post updates as we go, along with a border pattern.  Why not join the CAL group.


Pin it for later...


I can't wait to get started and I do hope you will join me.

Happy hooking!
Catherine
x


Facebook CAL Group

Ravelry Pattern Page


I have been asked for an equivalent colour substitution for Stylecraft Special DK and while the colours are not an exact match this is the closest I could get...


You might also like...


This post contains Amazon affiliate links...