Saturday 8 June 2019

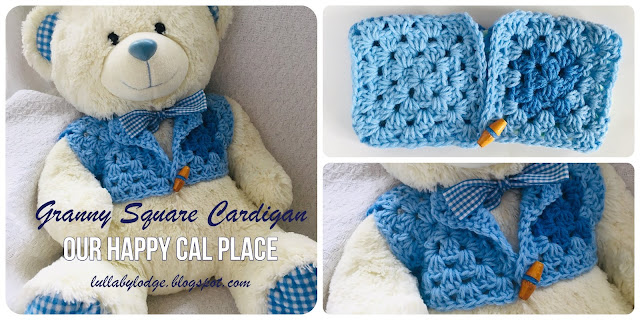
Granny Square Cardigan - Our Happy CAL Place, weekly & monthly CAL group on Ravelry...

 Hello, it's Saturday again and it's time to share with you what we have been making in Our Happy CAL Place.  This week's pattern was the Lemon Squeezy Cardigan by Potter & Bloom and is actually designed to fit a toddler.  I didn't have anyone at hand to model it for me so I made mine for Teddy.


I had to make quite a few adjustments to make it fit as the pattern is not really designed for the likes of my furry friend.  Instead of the original 8 squares that are called for I went for just 4.  Poor Teddy's tummy was rather too portly for the other squares to fit... 


He does look rather pleased with himself and his new outfit.


Why not head over to this week's CAL and check out the other members projects, or join in the fun yourself.


Pin it for later...


Thanks for stopping by and don't forget to follow (in the sidebar) and subscribe for more posts like this...

Take care
Catherine
x


Related posts...

Granny Square Summer Bonnet


The Perfect Granny Square


This post contains Amazon affiliate links...


Friday 7 June 2019

Crochet tops, perfect for your summer wardrobe - Free crochet patterns selected by Lullaby Lodge...

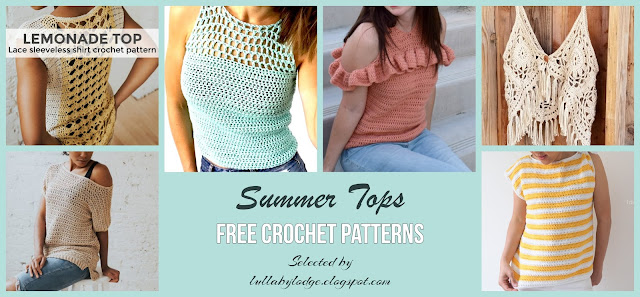
It's just a few weeks until the school summer holidays and I wanted to share some more summery patterns with you.  There is still time to whip up a lovely crochet top and I have found some beauties to share with you today.  I'm sure there will be something for everyone, from a simple tee, to nautical stripes, to boho style granny squares.  Enjoy...


Crochet Summer Tops 


Everyone needs that perfect T-shirt in their wardrobe and this crochet one is just the thing.  It looks fabulous with jeans or thrown over a swimsuit at the pool.  The pattern is by T L Yarn Crafts.

Summertime Tee


I just love this stripy number, from One Dog Woof.

Monterey Bay Striped Top


 Pretty peach ruffles, make this top by Hooked on Homemade Happiness, super cute.

Cold Shoulder Crochet top


Another stunning top by T L Crafts.  She has lots of lovely patterns you really should check out her blog...

Lemonade Top


I think this next one is my favourite.  It's probably because of the colour, I just adore pale turquoise and minty colours.  The pattern is by Stitch & Hustle.

Catalina Crochet Tank Top


...and lastly we have this stunning boho style granny square top.  Another pattern by Hooked on Homemade Happiness.

Boho Tank Top


I hope you enjoyed my selections this week and I will be back again for more freebies next Friday.  Be sure to subscribe for more posts like this.

See you soon
Catherine
x


Related posts...


This post contains Amazon affiliate links...


Tuesday 4 June 2019

Granny circles - how to make them and what to use them for - Lullaby Lodge tutorial

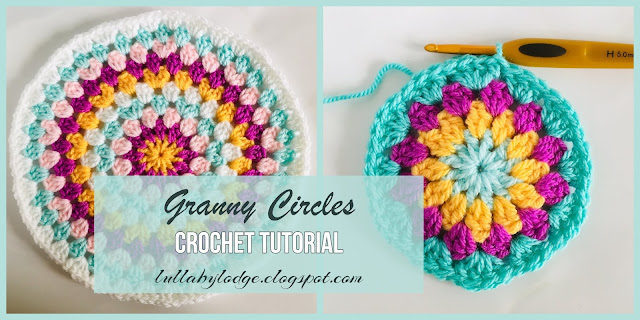
This week we will be learning how to make these gorgeous, colourful, granny circles.   I will also be showing you the maths for increasing your circles, so that you can make them any size you like.  There is something about any kind of crochet made with granny clusters, that just makes me feel so happy and homey and of course a little colourful, crochet, hooky, will always brighten up any dreary day.


Granny Circles

Materials

Yarn
Darning needle

Hook

Use a hook recommended on your yarn ball band

Abbreviations / Terms

US terms are used through out (UK terms)
dc - double crochet (treble crochet)
ch - chain
sl st - slip stitch
st(s) - stitch(s)
sp(s) - space(s)
gcl - granny cluster
cl-inc - granny cluster increase

Special stitches:  Granny cluster - 3dc in same sp.  Granny cluster increase - 4dc in same sp.

Other notes: Fasten off and join new colour after each round.  If you wish to make your granny circles in a solid colour simply sl st into the next sp instead of joining a new colour.

Ch4 and join with sl st to form ring.

Round 1 ch3 (counts as dc), 11dc into ring, join with sl st to top ch3.  (12dc)


Round 2 join new colour in any sp between stitches.  Ch3, dc in same sp, [2dc in next sp] repeat around, join with sl st to top ch3.  (24dc)


Round 3 join new colour in any sp between groups of sts, ch3, 2dc in same sp, gcl in next sp and every sp around, join with sl st to top ch3.  (12gcl)


Round 4 join new colour in any sp, ch3, 3dc in same sp, [gcl in next sp, cl-inc in next sp] repeat around ending with gcl in last sp, join with sl st to top ch3.  (6gcl, 6cl-inc)


Round 5 join new colour in any sp after gcl, ch3, 2dc in same sp, [gcl in sp in middle of cl-inc, gcl in next 2 sps] repeat around ending with gcl in sp in middle of cl-inc, gcl in last sp, join with sl st to top ch3.  (18gcl)

Round 6 repeat round 4.

Round 7 repeat round 5.

Round 8 join new colour in any sp, ch3, 3dc in same sp, [gcl in next 2 sps, cl-inc in next sp] repeat around ending with gcl in last sp, join with sl st to top ch3.

Round 9 join new colour in any sp, ch3, 2dc in same sp, gcl in every sp and glc in every sp in middle of cl-inc.


Rounds 8 & 9 form pattern, however the number of sps in round 8 must be increased by 1 each time.  For example where is says [gcl in next 2 sps, cl-inc in next sp] the number 2 must be increased by 1 each round so round 10 would be [gcl in next 3 sps, cl-inc in next sp].  Oh and don't forget to weave in all those pesky ends.


Pin it!


Following this formula you can make your granny circles any size you like.  What can you use them for I hear you say?  There are so many projects that can utilise granny circles.  Made with cotton yarn they would make great coasters, table mats or mandalas.  You could use mega chunky yarn and make a gorgeous rug.  I have used a granny circle as the base for a beach bag pattern I am currently designing.


What would you use yours for?  Let me know in the comments below, and don't forget to follow (in the sidebar) and subscribe for more posts like this.

Happy hooking!
Catherine
x


Related posts...


This post contains Amazon affiliate links...


Saturday 1 June 2019

Scalloped Edge Hanger Cover - Our Happy CAL Place, weekly & monthly CAL group on Ravelry...

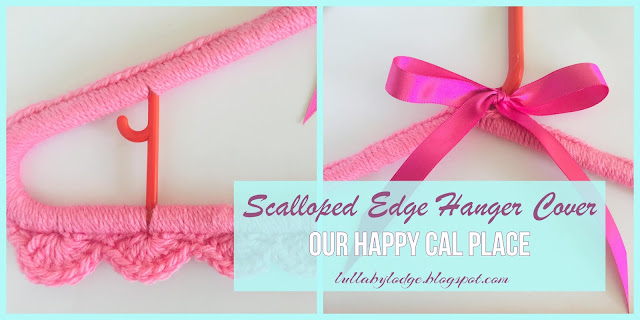
Hello everyone!  This week in Our Happy CAL Place we have been making these super cute hanger covers.  If your clothes keep slipping off, then you need this pattern!  Or maybe you would like to make a quick gift for someone?  They are just so pretty, a reason to make them is really not needed.  The group is open to everyone one and holds weekly and monthly crochet alongs, so come and join us...


The hanger pattern is by Bernat Design Studio and can be found here on Ravelry.  There is also a helpful video by Mikey,  I always find watching a video, easier than reading a pattern, especially with unusual designs.


You start off by crocheting single crochet stitches around the hanger and then a row of shells is added to the bottom...


A pretty ribbon adds a finishing touch...


Wouldn't this be just perfect for a little girls wardrobe...


The pattern and video are really easy to follow, the application however is a little more tricky.  I found I needed to hold my yarn quite tightly, to get an even coverage of the hanger and my hands got tired very quickly. 

Why not pin it for later...


 I do think the finished article was totally worth it though.  What do you think?  Do you have anyone that would love one of these?  Let me know in the comments below and don't forget to follow (in the sidebar) and subscribe for more posts like this...


I'll be back soon...
Catherine
x

Related posts...


This post contains Amazon affiliate links...
Friday 31 May 2019

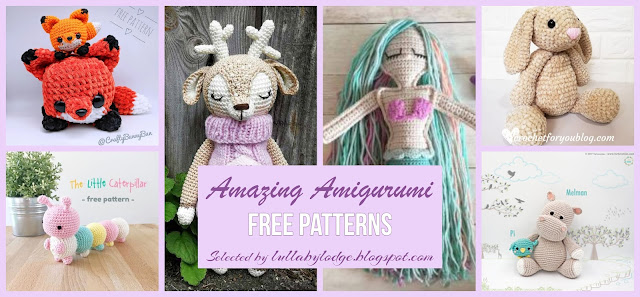
Amazing Amigurumi - Free crochet patterns selected by Lullaby Lodge

I learned to knit when I was around 7 years old, my mum taught me.  I made lots of things as a child, mostly clothes for my dolls and then I didn't knit for many years.  It wasn't until I had my son that I took up my needles again and the first thing I made was a knitted Iggle Piggle.  My son loved In The Night Garden and this was the first of many knitted toys I made for him.  I had caught the bug again and also taught myself to crochet, watching videos on Youtube.  I no longer make any stuffed toys as Little T is, well, not so little anymore.  I very much admire all the amazing amigurumi patterns out there though and thought you might like to see some of my favourites...


Amazing Amigurumi


I love foxes and these amigurumi ones are just adorable and super squishy, crocheted in chenille yarn.  The pattern is by Crafty Bunny Bun.

Foxy Fox Amigurumi


This crochet deer is too cute for words and I just love his knitted jumper.  

Amigurumi Deer


Another amigurumi crocheted in chenille yarn, this time an adorable bunny with floppy ears.  The pattern is available at Crochet For You blog.

Velvet Bunny


Any Hungry Caterpillar fans out there?  Then this is the pattern for you.  Designed by Aidie & Jelly Bean.

The Little Caterpillar


Why not crochet this super cute hippo and his tiny friend.  Pattern by Tarturumies.

Melman & Pi


I think this one is my favourite, I have always had a love of rag dolls and this mermaid rad doll is just stunning.  The pattern is by Spin a Yarn Crochet.

Rag Doll Mermaid


That's it for Freebie Friday, I hope you enjoyed my selections.  Which one is your favourite?  Let me know in the comments below and don't forget to follow (in the sidebar) and subscribe for more posts like this.

See you soon...
Catherine
x

Related posts...


This post contains Amazon affiliate links...


Tuesday 28 May 2019

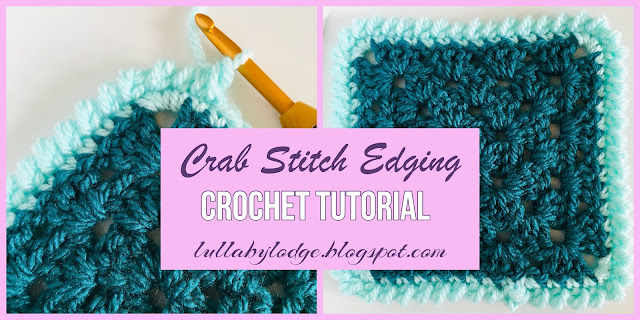
Crab Stitch Edging - Learn how to add a finishing touch to your projects with this tutorial by Lullaby Lodge.

One of my favourite things to crochet is blankets.  I just love the whole process from start to finish.  Scouring the internet for ideas of colours, shapes, texture; choosing yarn and making that first long wiggly starting chain, working on the body of the blanket, joining motifs, but my favourite part about blanket making is adding the border.  It's that time when your project is almost finished and you can see exactly how your blanket will look.  I love that feeling of completion you get while adding your final rounds.

The style of your blanket will determine what kind of edging you add.  I have used fancy, lace edgings in the past, bobble edgings, pretty shells and I love them all; but sometimes you just want something simple and nothing could be more simple and effective than a crab stitch border.


Crab Stitch Edging


Materials

Yarn
Darning needle

Hook

Use a hook that matches your project and yarn

Abbreviations / Terms

US terms are used through out (UK terms)
sc - single crochet (double crochet)
ch - chain
sl st - slip stitch
st(s) - stitch(s)


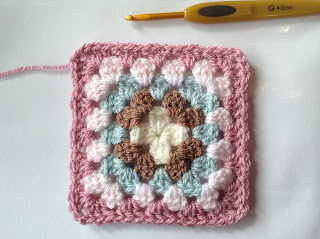
I am using a granny square as a sample piece to show you how to work the edging, but you can add your border to any project.  Use the same yarn and hook size that you used for the main body of your project.  First we need to work a round of sc.  

Round 1 join your yarn with a sl st anywhere on your project, ch1 and sc in same st.  Sc in every st.


If your project has corners, 3sc in each corner...


Join with sl st to starting sc.  


We will now work around our project putting a sc in every sc, but this time we will be working from left to right.  This can feel a bit counter intuitive but once you get the hang of it you can get a nice rhythm going.


Round 2 sc in every sc (working from left to right).


Crab stitch will easily go around your corners with no need for extra stitches...


Finish with a sl st to starting sc.


Crab Stitch makes a great edging for ripple blankets as the stitch easily flows along the ridges.


I made this blanket a few years ago and it is still one of our favourites...


Thank you for reading and don't forget to follow (in the sidebar) and subscribe for more posts like this...

See you soon
Catherine
x

Related posts 

The Blanket Stitch


Simple Shell Edging


This post contains Amazon affiliate links...