Wednesday 13 November 2019

Windsor In Autumn - A bike ride along the river...

This morning I rode into Windsor.  I needed to return some clothing that did not fit.  After dropping Little T off at school I had an hour to kill before the shops opened, so I decided to take the scenic route into town.  It was such a beautiful morning, with blue skies and crisp air.

It is such a pretty bike ride at this time of year with the trees all golden.  This part of the river has many boat houses.


The swans were splashing about.  The signets starting to lose their baby feathers are becoming white like their parents.


This swan came right up to me when I stopped to take the photo.  I think he thought I had something for him to eat.  Sorry Mister Swan.


A nice view of Eton Bridge.


It was nice to have the time to just stop and look, something we often forget to do with our busy lives.

Have a lovely day...
Catherine
x

You might also like...


Monday 11 November 2019

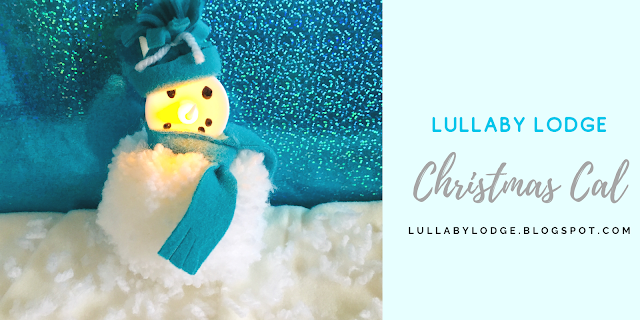
Tea Light Snowman - Time to get crafting with the kids and make this super cute pom pom snowman - Christmas Cal

Hello everyone!  It's time for our second edition of our Christmas craft along and this week it's one for the kids to enjoy.  Little T loved making this super cute, Tea Light Snowman.  This project is great for using up scraps of yarn and fabric and is so simple to make.  This snowman will look adorable hanging from your tree this year.


Tea Light Snowman


Materials

Glue
Black marker
Scraps of fabric
Ribbon


Start by making a large pom pom.  Little T used a Clover Pom Pom Maker for this, but, you can use your prefered method.  There are many videos on Youtube if you have never made them before.  


Make sure you use plenty of yarn so your pom pom is extra fluffy.


Carefully cut the yarn and tie securely.


Trim into shape...


Draw a face on your tea light with a black marker.


Glue to the top of your pom pom


Cut a strip of fabric for the scarf and snip the ends to make a fringe.


Cut another strip of fabric and glue a fold on one side for the brim of the hat.  Cut a fringe along the other side.


Glue the two short edges together and tie a piece of yarn around to make a pom pom hat.


Glue your hat and scarf onto your snowman.  Add a hanging ribbon if you are planning on hanging him from your tree.


Your kids will love making these...


Little T even took some of his own photos...


Pin it for later...


I hope your kids will love making this snowman.  I will be back next week with more Christmas crafts, so be sure to subscribe so you don't miss out.

Happy crafting!
Catherine
x

You might also like...


This post contains Amazon affiliate links...


Monday 4 November 2019

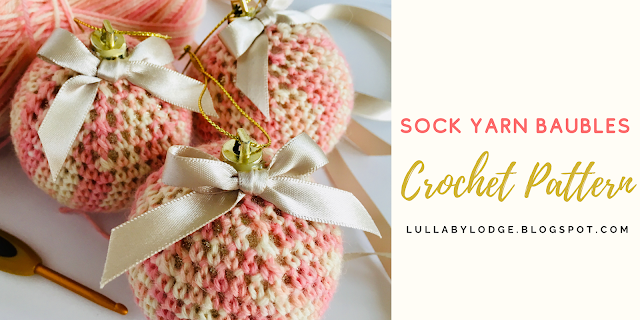
Sock Yarn Baubles - Let's have a Christmas craft along! New projects every week until Christmas...

Hello friends, Halloween is over and the weather is getting colder, which means we are nearing my favourite time of year.  I just love Christmas and what better way to build the excitement than with some Christmas crafts.  Join me all through November and December as I try out lots of new projects with a Christmasy theme.  There will be lots of crochet and other yarny crafts, kids crafts and more.  Make sure you subscribe so you don't miss out on any posts, and why not join my Facebook Group too, where we can all share our Christmas makes...


Our first project for the Christmas CAL is one of my own designs.  It is actually the first ever pattern I wrote on this blog and it has been updated and improved with new artwork, including round by round photos.  If you would like to see the original pattern you can do so here...


Sock Yarn Baubles


Materials

Sock yarn (small amounts)
Darning needle
Tiny bows or some ribbon
60mm bauble
Stitch marker
Glue gun
Hot glue sticks


Hook

3.5mm (E)

Abbreviations US Terms (UK Conversion)

sc - single crochet (double crochet)
sc2tog - single crochet 2 together (double crochet 2 together)
ch - chain
st(s) - stitch(es)
pm - place marker

Other notes:  Sock Yarn Baubles are worked in a spiral.  Do not join at the end of rounds.  Move marker up at the end of each round.

Starting with a magic loop

Round 1 ch1 (does not count as st), 6sc into ring.  Pull tight but do not join. Pm in 1st sc.


Round 2 Starting in the first sc from previous round 2sc in each stitch around (12sc)


Round 3 [2 sc in first stitch, sc in next st] repeat around (18sc)


Round 4 [2sc in first stitch, sc in next 2 sts] repeat around (24sc)

Rounds 5-7 Continue to increase by 6 sts in each round until you have 42sc


Rounds 8-14 Sc in each st around.  


At this point try your crochet around your ball.  It should be a little over half way up the bauble, when stretched.  If it is not over half way you can add a few extra rounds of sc in each stitch until it looks like the photo below...


Round 15 [sc2tog, sc5] repeat around.  (36sc)

Round 16 [sc2tog, sc4] repeat around.  (30sc)

Round 17 [sc2tog, sc3] repeat around.  (24sc)


Now comes the tricky part, stretch your crochet over the plastic ball and continue to work around.  You need to stretch your crochet quite tightly, this stretches the stitches and allows your sparkly bauble to peek through the crochet.


Round 18-20 Continue to decrease 6 sts in each round until you have 6 sts.


Bind off leaving a long tail and thread yarn onto a sewing needle.  work your yarn under each stitch and pull tight.  I find it easier to pop off the top of the bauble to do this.  Bind off hiding yarn inside the crochet.  


Replace the top of your bauble and add a cute bow, attach with some hot glue.


Make lots more to fill your tree...


If you would like to help support my work an ad free pdf of this pattern is available in my Etsy Store.


Pin it for later...


I hope you enjoyed this pattern and I would love you to join in with the CAL.  Be sure to share your projects in the Facebook Group and subscribe for more posts like this...

Happy hooking!
Catherine
x

You might also like...


This post contains Amazon affiliate links...


Monday 28 October 2019

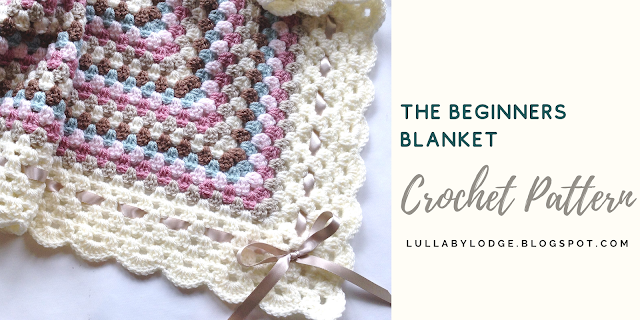
The Beginners Blanket - Just learned to crochet and ready to make your first blanket? This is the pattern for you...

Everyone loves a granny square and if you know me, you know, they are my favourite things to crochet.   I just love granny square blankets.  Whether they are lots of squares joined together, or one giant granny square.   Crochet squares are also great for beginners too and if you have learned the basic stitches and would like to make your first blanket, then this is the one for you.  This granny square blanket was one of the first patterns that I wrote and was previously only available to buy in my Etsy store.  I hope you enjoy this free version.


As a Lovecrafts affiliate I may receive a small commission from qualifying purchases...


The Beginners Blanket


Materials

1 ball each Stylecraft Special DK in colours, Cream, Mocha, Duck Egg, Soft Peach, Pale Rose & Parchment

Hook


Size

Approx 70 x 70 cm

Abbreviations / (UK conversion)

US terms used throughout 
sc - single crochet (double crochet)
dc - double crochet (treble crochet)
sl st - slip stitch
ch - chain
st - stitch
sp - space

Other notes: US terminology is used throughout.  The beginners blanket is worked in rounds.  Finish every round by joining with a slip stitch to the top of chain 3 from beginning of round.  You will start each round with a new colour (unless otherwise stated), working in the following colour sequence Cream - Mocha - Duck Egg - Soft Peach - Pale Rose – Parchment.  Work is turned over after each round.  This ensures no twisting of the corners as the blanket gets larger, it also gives a lovely texture.   This pattern is designed for babies but the blanket can be easily adapted to make any size.

 Ch4 and join with sl st to form ring

Round 1 (right side) ch3, 2dc into ring, ch2, [ 3dc into ring, ch2] 3 times, join.  Turn.


Round 2 join new colour in any corner sp, ch3, 2dc into same sp, ch2, 3dc into same sp (corner formed), [ 3dc into next sp, ch2, 3dc into same sp] x3, join.  Turn.


Round 3 join new colour in any corner sp, chain 3, 2dc in same sp, ch2, 3dc in same sp, [3dc in next sp, 3dc in next sp, ch2, 3dc in same sp] x 3, 3dc in next sp, join.  Turn.


Rounds 4-30 continue working 3dc in each sp and [3dc, ch2, 3dc] in each corner.


Rounds 31-36 continue as before using cream only.


Shell Edging 


Round 1 sl st in corner sp, ch3, 8dc in same sp, *[sc in next sp, 7dc in next sp] repeat until next corner ending with sc**.  In corner 9 dc.* Repeat from *to* twice and from *to** once, join.  Weave in ends


Optional – divide ribbon into 4 equal pieces and thread in between the stitches along the side of blanket and tie with a bow in each corner.


If you would like to help support my work, you can purchase an ad free pdf version of this pattern in my Etsy Store.  


The pdf version also contains a second colourway and alternate border...


You can make this blanket bigger, just simply keep adding more rounds until you reach your desired size.  The Shell Edging must be made on an odd numbered round.  You can also easily substitute yarn too, just use the hook size recommended on the ball band.  Giant granny square blankets look fabulous crocheted in chunky yarn and make a great quick and easy project.


Pin it for later...


If you liked this pattern please be sure to subscribe.   I post every week with tutorials, reviews free patterns and more...

Enjoy!

Catherine
x


The Beginners' Blanket PDF Etsy Store


The Beginners' Blanket PDF Love Crafts Store


If you love Lullaby Lodge and would like to receive exclusive content, why not check out my premium subscription service at Patreon...


You might also like...


This post contains Amazon affiliate links...